

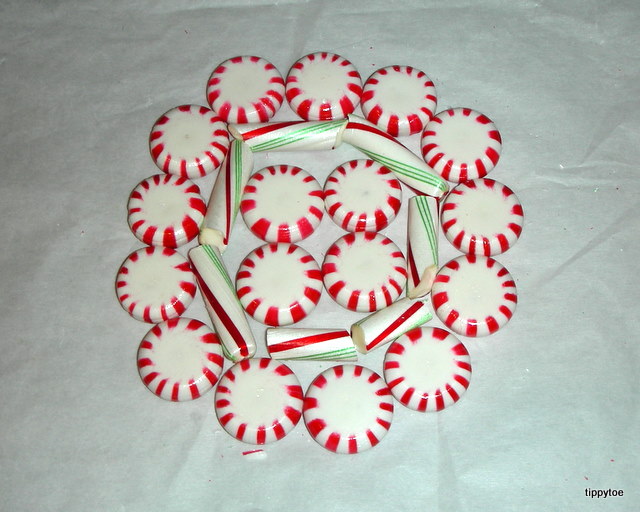
It all started with a post I read about using peppermint disk candies to make bowls and plates. As soon as I read this post from Refresh Restyle, I sent the link to my sisters and mom and asked if we could please, pretty please, make these Christmas day. They seemed to be as excited as I was. So after a wonderful Christmas brunch and a little Michael Jackson Wii dancing, we headed to the kitchen. We preheated the oven to 350 degrees and started unwrapping peppermint candies. We had wanted to add some green ones in, but couldn't find them at the store so we used candy canes that had green stripes. My sister Sarah had made one before we all gathered at her house, but it broke so she planned on re-melting it. The rest of us laid out our candies how we wanted them. We covered cookie sheets with parchment paper and put the candy on top. We also had some butterscotch candies so we thought we'd try those as well.


After the candy cooled, she had a lovely bowl.

She didn't like some of the higher edges, so she started whacking them with a butter knife!


And nephews:

OK, back in the kitchen. My mom decided she wanted to follow the directions on the Refresh Restyle website exactly, using the same number of candies. So after it came out of the oven, it was carefully set on an upside down bowl.

My sister Nancy helped her stretch it out to a good shape before it cooled too much. (The extra set of hands in a lot of these photos belong to Nanc!) It worked great.

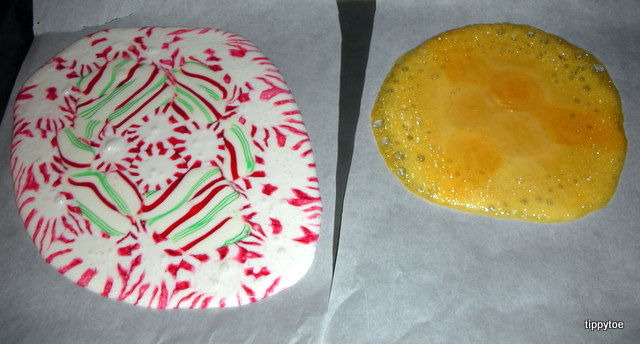
But it still wasn't right. Why? Because the side that touches the parchment paper isn't shiny. And that's the side that faces up in the bowl. We wanted a shiny bowl. So my mom tried one more time. Meanwhile, I wanted to try again with the candy canes in the middle, so I made another one, but this time smaller.
And here it is melted.

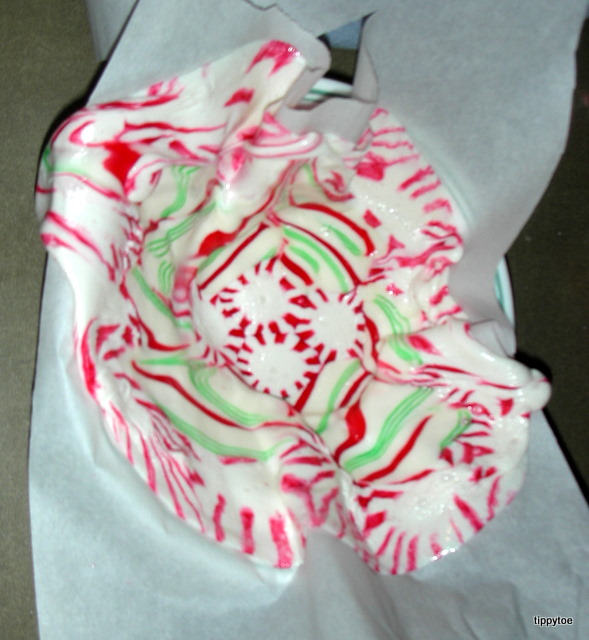
This one we carefully draped over the same bowl.

Here's how it looked when it was done.

I liked it, even though it wasn't shiny-side up. Maybe I'll spray it with a clear-coat finish. Sarah tried another one, too, this time crushing up the candies in the middle. She used the back of an ice cream scooper and whacked away. (She seemed to enjoy that a little too much!) But when it melted it just looked like the middle candies melted funny. You couldn't really tell they were crushed.

She kept this one flat and used it as a cookie plate.

And here is my mom's final attempt, with the candies cooling upside down on a bowl.

We thought it would turn out perfectly, but the candy stuck to the bowl and we couldn't get it off! Sarah finally pulled hard enough and it broke in half. But Nanc held the pieces together for one last picture.

And remember Sarah's first bowl, the one that was put in the oven three times? Here is what it finally ended up looking like.

How cool is that? So in all, we made 8 dishes. (Or 10 if you count Sarah's first two attempts at her bowl.) We learned a few things along the way and had a blast trying different techniques. And if anyone out there is still reading this forever-long post, here are two more pictures too cute to not be included. My niece Greta with grandma and grandpa.


Thanks for a wonderful Christmas day, girls!
2 comments:
edible bowl - yummmyyyyyyyy! who needs the biscuits!
Do you think if you laid the melted candy paper side down into a bowl it would droop into the bowl shape? Maybe use two identical bowls to mold between the two?
Post a Comment