Thursday, January 28, 2016

Footprints in the Snow

This project was inspired by an ornament craft I saw in an Oriental Trading magazine. It was very simple to do. First the kids used a Q-tip dipped in white paint to make snow falling from the sky on blue paper.
Then I cut white paper and glued it to the bottom half of the blue paper. I helped the kids make thumbprints on the paper with blue ink. We started at the bottom and worked our way up.
Then they glued on a little person at the top of the hill. I had a "boy" cookie cutter that looked like a kid in a snowsuit, so I just traced that. And I added a little point to the hood. We also added a tiny white pom pom to the tip of the hood.
And that's it! They turned out cute, even if all of our little people apparently walk like a duck!


Wednesday, January 20, 2016

Penguin Chick Craft

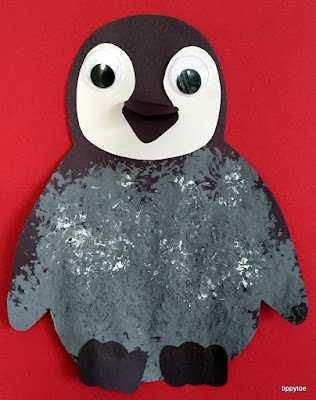
I read in the news the other day that January 20th is Penguin Awareness Day, so I knew I wanted to make a penguin craft with the kids today. I've done a few penguin crafts in the past, but this time I decided to make a baby penguin. My goal was to make something that resembled this cutie:
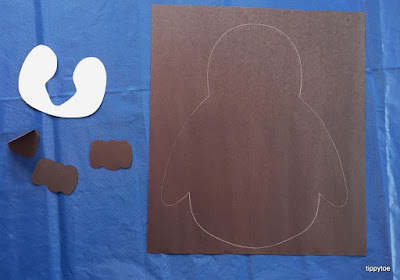
I kind of used this coloring sheet as my template, but made it more symmetrical. I traced a body onto black paper. I cut out a white face, a black beak and black toes.
Then I made puffy paint by mixing glue and shaving cream and added in some white and black paint.
If I had to do it again, I wouldn't bother with puffy paint. The kids used porcupine balls to paint the body of the penguin and you can't really put it on thick when using those. It didn't dry puffy at all, so it wasn't necessary. They dabbed the ball all over to create a fuzzy-looking texture. I covered up the head with a paper towel so they wouldn't paint it, but I'm sure older kids wouldn't need that.

Then they dabbed on some plain white paint right over the gray paint.
Next it was time to glue on the white face and beak. We turned the paper upside down so they wouldn't have to lean over the wet paint. And because a black beak would have been lost on the black part of the face, I made them three dimensional by folding the paper before cutting them out.
Then wiggle eyes were glued on. When the paint was dry, I cut them out and the kids added toes to the bottom of their penguins. They turned out so much cuter than I imagined!


I love the crooked white face on my daughter's above. Totally adorable!

Fun Fact: When a penguin chick hatches, it immediately starts calling so its parents recognize its voice. This is important so that when the mother or father return after getting food, they can find their chick just by the sound of its voice.

Thursday, January 7, 2016

Snowman Suncatcher

I've always liked how paper towels look after cleaning up after a painting activity, but I've never done a project with those paper towels before. After seeing the suncatchers on Simple Fun For Kids, I just had to have my little ones make one. For this craft I had the kids deliberately paint the paper towels. I wanted to use watercolors, but didn't have any with me. I ended up using tempera paint and told the kids to wet their paintbrushes often.
I reminded them to press gently with their brush so they wouldn't rip the paper towel.
And then I even sprayed the paper towel with water when they were done painting so the colors would blend even more.
The hard part was waiting for them to dry. They took a really long time so I ended up finishing this craft the next day. I found a simple snowman silhouette that I liked and used it as my template. I cut out the snowman from black construction paper and used a glue stick to apply glue all along the edge of the now missing snowman.
Then I flipped it over and pressed it onto the paper towel. Once it was set in place, I added some more glue to the corners just to make sure it was secure. They actually looked really good before they were even in the window!
And I love the design from the paper towels. I didn't think anything of it at the time we were painting them, but it added a whimsical touch to our snowmen!
Finally, I taped them to the window so they could catch the light. When we started this craft it was a very sunny day. So of course when we finished it, it was cloudy and even snowing. But they still look beautiful!
This is when I miss teaching in a classroom. I think a big window filled with these would be so pretty. I'd probably have the kids cut the snowman shape out themselves. And older kids could draw their own snowman shape first and then cut it out so each one would be unique. And if I was smart, I would have cut the snowmen out carefully so we could use them for another craft. But instead I stabbed each one right in the middle to get it started so it was easier to cut. Lesson learned!