PLANETS
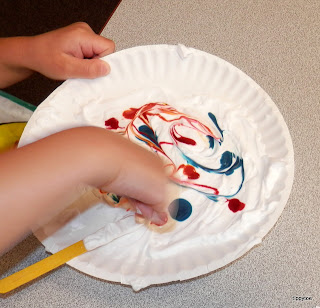
First we made planets by using shaving cream and food coloring. I sprayed the shaving cream on a plate and the kids smoothed it out with a craft stick. Then they picked three colors of food coloring and I put a few drops of each on top of the shaving cream.
Then they used a toothpick to swirl it around, but not mixing it too much.
Then they placed a white piece of paper on top of the shaving cream and pressed down gently.
Finally, they lifted the paper off and used a craft stick to scrape off the shaving cream, leaving a beautiful design behind.
When they were dry, I cut circles from them and added a ring around each one so they would look like planets. I also added some things to orbit their planets. I found these years ago and don't know where I got them. Sorry! But I attached them to the middle of the planet with a brass fastener so they could go all the way around.
FULL MOONS
To make craters on our moons, we used soapy water and added food coloring. The kids used a straw to blow bubbles (very gently!) in a cup. When the bubbles climbed higher than the rim of the cup, the kids put white paper on top, popping the bubbles as they did so.
It left really cool designs. I cut circles out of them and added a toothpick flag.
CRESCENT MOONS
One of my coworkers let me borrow her sticky ball (or whatever it's called) to make different moon craters. I put some gray paint on a paper plate and the kids dipped the ball into the paint and dabbed it on their paper a bunch of times. (I first had the paint on a plastic plate, but the sticky ball kept sticking to the plate and it was really hard to get off!!)
I cut crescent shapes from the paper and our moons were done. So simple!
I'm definitely going to buy some more sticky balls for painting. The kids had a lot of fun with it!


.JPG)
.JPG)


.JPG)
.JPG)
.JPG)


1 comment:
I LOVE ALL THREE OF THESE!! What an awesome space week! I can't wait to try all of these, seriously, I love them!!
Post a Comment