Tuesday, January 14, 2014

Paper Penguins

We are studying polar animals this week. (Yay!) Today we talked about penguins, but we mostly learned about Emperor Penguins. For the craft, the kids made it all by themselves. They drew the shapes (mostly ovals and triangles), cut them out and glued them together. We did this as a big group and went through the steps together. Each child had:
1/2 sheet black paper (body)
1/2 sheet black paper folded in half (wings/flippers)
1/4 sheet white paper (belly)
1/4 sheet orange paper folded in half (beak and feet)
white crayon
pencil
glue stick
kid scissors

So first they drew an oval on the 1/2 sheet of black paper and cut it out. Then they drew a smaller oval on the folded piece of black paper. When they cut that out, they had two. (Most of them were actually surprised they had two!)

Then they used the pencil to draw an oval on the white sheet of paper. I reminded them it had to fit inside their first black oval. Then to make the beak, I showed them how cutting a triangle from the folded side would result in a beak that opens and closes. They thought that was so cool. They also could make circles or triangles for feet, or really whatever shape they wanted.
Then they glued all the pieces together and added wiggle eyes. I displayed them on white paper cut to look like ice and titled it, Just Chillin'.
I love how unique each one is! Some kids even added eggs to the feet!!

Adorable, right?

Fun Fact: At about 4 feet tall, the Emperor Penguin is the largest species of penguin.

Friday, January 3, 2014

One in a Minion

The kids in my class love the minions from the Despicable Me movies. (And maybe I do, too! They are adorable!) I thought it would be fun for them to make their own minion. I did a google search of minions and printed out one I liked and used it as my template. (I found it here.) I made the body, overalls, legs, arms, gloves, eyes/goggles and the strap all from construction paper.

To make it a little easier for the kids, I had the shoes and legs as one piece (I just colored the shoes black) and I attached the white eyes to the gray goggles. They got to work gluing all the pieces on their tall or short minion. The arms were simple so they could go either way. They just glued on a glove to one end and glued the other end to the minion body. For the legs, they put some glue at the top and slid it under the minion body.
For the goggles, they glued on a strip of black paper, glued one big eye or two smaller eyes onto the strip and added the pupils. I trimmed off the extra black strip when they were all done with their craft. The buttons on the overalls were made with a regular hole punch, although we would have used real black buttons if we had them.
Then the kids used markers to make the mouths and hair.

A couple children said they wanted their minion to have teeth, so I cut some white squares out for them. They all turned out SO CUTE! I was a little worried they'd all look pretty much the same (as the real minions do) but they each have their own personality!


I hung them in the hall with the title, My Class is One in a Minion!
Everybody loves them!
Now I'm settled down for a nice long weekend. Schools have already been cancelled for Monday due to dangerously low temperatures. If you are in the same boat, stay warm!

Sunday, December 22, 2013

Simple Gingerbread Display

It's been a very busy month for me and it wasn't until last Monday that I realized I hadn't thought of a holiday class display yet. I've always done one in the past and I just couldn't NOT do one this year. So I did a very easy one that took hardly any time at all. I traced gingerbread boys and girls onto brown paper and the kids decorated them with markers, buttons and wiggle eyes.

I also printed out a coloring sheet of a gingerbread house (found here), but I made it poster size so it printed on 9 pieces of paper. After putting it together, I traced it onto a big sheet of white paper. The kids used markers and crayons to color it.
I printed out the words Happy Holidays and put them under the roof so I could trace the letters. (I don't trust myself to not screw up when writing free-hand.) I hung up the house in the hallway, cut out the gingerbread people and placed them around the house. So easy!

I've definitely done the opposite of easy before when I made this gingerbread house class display out of felt many years ago:
You can read more about that here, if you'd like!

Thursday, December 19, 2013

Gift for Parents: Framed Stained-Glass Trees

My kids have been very busy this week making their Christmas presents for their parents. I combined two ideas that I loved. First they made craft-stick frames, like those seen on I Heart Crafty Things, except we used jumbo craft sticks. Then they made stained-glass trees, as seen on Pam's Drawing Board. Put the two together and you have a beautiful gift!
They added glitter to their tissue paper squares while the glue was still wet.
And when it was all dry, I drew triangles on the back of the paper and they cut them out, glued on a trunk and then glued the trees inside the frame.

When I made my example, I used three trees,
but I thought that might be a bit much for them, plus they were really small. So I gave them the option of one big tree or two slightly smaller trees. I told them they didn't have to be perfect with their cutting because trees aren't perfect either. I love how they turned out!
I also decided to add a ribbon at the top for hanging because they look beautiful in a window with the sun shining in!

Thursday, December 12, 2013

Class Fairy Tale

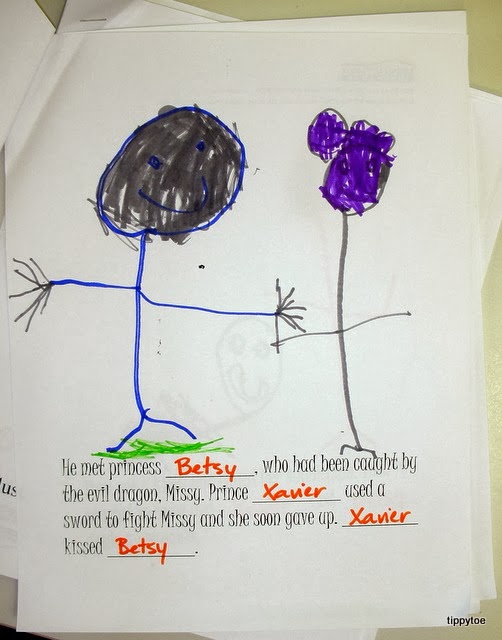
For our Medieval Times Fairy Tale theme, my class made up their own fairy tale! I wrote at the top of a big white board, "Once upon a time" and at the bottom I wrote, "happily ever after." The kids filled in the rest! Each child who wanted to participate gave an idea, a sentence, or even just a name to the story. It was a lot of fun! I did discuss with them beforehand that we need to introduce characters at the beginning, have a problem in the middle, and solve the problem at the end. I think for the most part that went over their heads, but they did a great job! That night I typed it up into a little book. I left the title blank so each child could come up with their own.
The story wasn't very long, so I was able to make it into four pages. I read what was on each page and the kids drew a picture to go along with it. Our fairy tale involved a jaguar so I put out a few stencils for the kids to trace. But some chose to draw it themselves, which was great!
When they were done, they each had their own fairy tale book that they could "read" themselves!

See those lines coming from the jaguar's mouth? Yeah, it ate the princess. But don't worry -- a knight came along and pulled her back out!

I also did this a couple years ago, but left all the character names blank so each child could write in their own names to make the story unique.

I recently found these pictures and I had forgotten that one little boy chose me as the princess!
So sweet!

Tuesday, December 10, 2013

Prince Crowns and Damsel Hats

We are talking about fairy tales this week so I decided to take it up a notch and teach the kids about Medieval Times. I even made a "castle" in dramatic play by using large white paper. I put it up on one wall, cut out some windows and drew vines on it.
It was bigger, but I had forgotten about the intercom on the wall, so I sliced off a little from each side. It was actually very easy to make. I've made something similar a few times at my other center, but my room had drop ceilings so I was able to hang the castle wall from the ceiling. I would make two walls and hang them in the corner so the kids could actually play inside the castle walls and look out the windows. (Sorry there are no pictures. It was pre-blog!) But there's no way I could hang it from the ceiling in my current center so I did the next best thing by taping it to the wall. I also brought in some princess and knight masks for the kids to wear.
The masks came from on old computer game I had (Kid Pix Adventures) and I've been using them for years. The princess mask is actually a Cleopatra mask -- it has a snake on the crown!
Anyway, today the kids made their own crowns. I made the prince crowns with large construction paper and the princess crowns (or damsel hats) with the same big white paper I made the castle out of. We used some self-adhesive jewels that I received from CraftProjectIdeas.com.
They were the perfect touch that our crowns needed. I also put out some foam heart stickers (and a few frogs, because a kissed frog might turn into a prince!).

I had to add a piece of scrap paper (that I saved when cutting out the crowns) so they'd fit around the boys' heads. Now, the damsel hats were a bit more complicated. I only have two girls in my class so I didn't mind the trouble. Many years ago I ordered damsel hat crafts from Oriental Trading Company and saved one for my template. It was too big for construction paper, which is why I used the big white butcher paper. However, the white paper was super thin and not ideal but I was able to work with it. Here's how it looks cut out:
The girls decorated the paper the same way the boys did.
Then I added a bunch of ribbon to the top. I just taped the ends in place. In the past I've also used crepe paper instead of ribbon. It works just as well.
Then all you have to do is roll it up and staple or tape it together. My paper was very flimsy which made this step difficult. I've also cut big circles out of paper and cut a slit halfway through the circle and then just rolled it into a cone that way. That was actually easier, but you waste a lot of paper when rolling it up and most of the decorating gets hidden.
The ribbon hangs down the back of the hat.
These hats don't stay on well so I added an elastic string to go around their neck. Because the paper was thin, I made the area that had the hole punch in it stronger by putting packaging tape over it. Does that make sense? All the trouble was worth it, though, because they all loved wearing their royal crowns!