Today I did a little pollution activity with my kids. I filled a container with water and asked each child to drop in an ocean animal. Yes, ocean animal. And yes, my title says pond. We were pretending this was a pond, but all I had were ocean animals. Just go with it, okay? ;o)
We talked about how clean the water was, and how lucky the animals were to have such clean water. Then I threw in a straw and the plastic rings from soda cans.
We discussed how those could cause problems to the animals in the "pond" and the animals that drink from the pond. Then I threw in a crumpled piece of paper that had drawings on it. I told some story about how a child didn't want to keep the art he made at school that day, so he tossed it into the pond. The blue ink from the marker turned the water slightly blue.
Again, we discussed how this might effect the animals. Then I poured in a little bit of old coffee, saying maybe someone was done drinking it and just decided to toss what was left into the pond.
This really grossed out the kids. Which, of course, was my plan all along! The kids took turns mentioning all the bad things that can happen to the animals from all this pollution in the water. And then I asked if any of them wanted a drink from our pond.
Everyone said no. So I said, "If you wouldn't want to drink from it, why would the animals want to?" I hope the kids learned a little lesson today about keeping our planet clean!
**Linking up to For the Kids Fridays!**
Wednesday, April 18, 2012
Stained Glass Earths
I have a simple craft to share with you today. We used tissue paper to make Earth suncatchers. In addition to the tissue paper, I also set out crepe paper squares. I thought it would give the earths some texture.
I made a circle on white paper (by tracing one of the bowls in the above picture) and the kids painted it with watered-down glue.
Then they added the tissue and crepe paper.
And finally they brushed on another layer of glue.
I was thinking of giving them a coloring page of the earth so they would know where to put the land and where to put the water, but then I thought, why can't they make the earth any way they want? So that's what they did and the earths turned out beautifully.
Here's a close-up of the crepe paper:
I love the texture!
If you like these, check out our stained glass apples and seahorses!
**Linking up to Sharing Saturday!**
I made a circle on white paper (by tracing one of the bowls in the above picture) and the kids painted it with watered-down glue.
Then they added the tissue and crepe paper.
And finally they brushed on another layer of glue.
I was thinking of giving them a coloring page of the earth so they would know where to put the land and where to put the water, but then I thought, why can't they make the earth any way they want? So that's what they did and the earths turned out beautifully.
Here's a close-up of the crepe paper:
I love the texture!
If you like these, check out our stained glass apples and seahorses!
**Linking up to Sharing Saturday!**
Tuesday, April 17, 2012
Earth Day Booklet
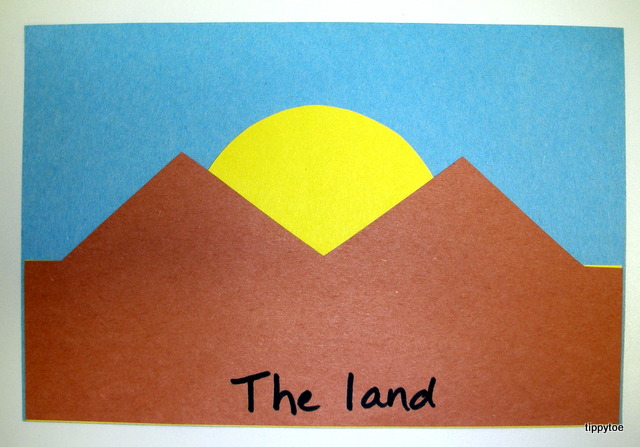
Several years ago my nephew brought home a little Earth Day booklet from his preschool. (He's 12 now!) My sister showed it to me because she thought I could use it at my school. And she was right. I've done this craft every year since then.
Over the years, I've also called this one "the earth" and "the mountains" but I thought "the land" summed it all up nicely.
Some kids drew clouds with a white crayon in their sky.
So this is how we made it. I traced all my templates onto colored paper. In the past, I've also done it on a full sheet of construction paper, but this year I finally realized that's not necessary! A half sheet does just fine, and it saves paper. Perfect for Earth Day. I used dotted lines to write the words at the bottom so the kids could trace them. And I put X's on the parts of the paper that weren't needed for our booklet. That let the kids know it was okay to cut through them with their scissors. We put the paper we cut off in our scrap bucket for future projects.
(I cut the oval out ahead of time.)
Then the kids cut on the lines. The tree was definitely the hardest.
When all the pages were finished...
...I stapled it together into a booklet.
We talked about how it's important to protect all the parts of the earth. The kids enjoyed being able to read their own books!
Let me show you the inside, then I'll show you how the kids made it.
Over the years, I've also called this one "the earth" and "the mountains" but I thought "the land" summed it all up nicely.
Some kids drew clouds with a white crayon in their sky.
So this is how we made it. I traced all my templates onto colored paper. In the past, I've also done it on a full sheet of construction paper, but this year I finally realized that's not necessary! A half sheet does just fine, and it saves paper. Perfect for Earth Day. I used dotted lines to write the words at the bottom so the kids could trace them. And I put X's on the parts of the paper that weren't needed for our booklet. That let the kids know it was okay to cut through them with their scissors. We put the paper we cut off in our scrap bucket for future projects.
(I cut the oval out ahead of time.)
Then the kids cut on the lines. The tree was definitely the hardest.
When all the pages were finished...
...I stapled it together into a booklet.
We talked about how it's important to protect all the parts of the earth. The kids enjoyed being able to read their own books!
**Linking up to Fun Stuff Fridays!**
Monday, April 16, 2012
Earth Hearts
So I noticed as I wrote the title of this post that all you have to do is move the H in heart from the front to the back and you have Earth. Cool!
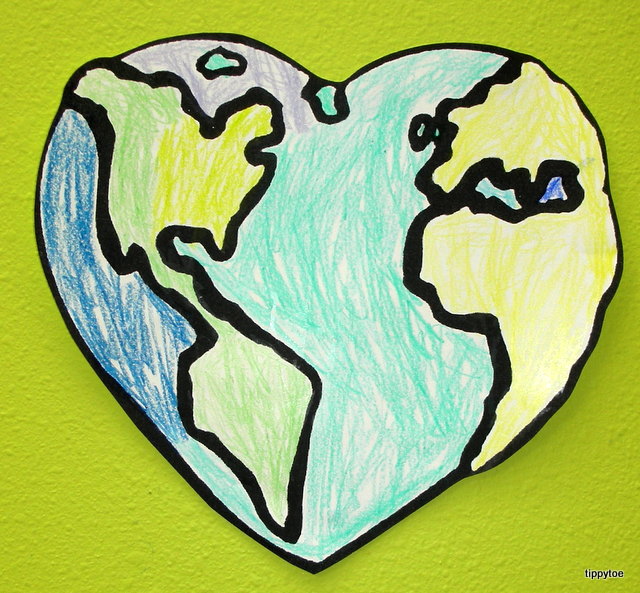
I wasn't planning on blogging about today's art project because it was just coloring, but when the kids finished their art a few of them asked, "Don't you want to take a picture of it?" So of course I did! I got the earth-heart idea from A Cupcake for the Teacher. I was just planning on having them color an earth and then cut a heart out of it, but then I found this awesome coloring sheet:
I love how it looks almost 3D. (You can find it here.) I went through my box of 120 crayons and took out all the blue and green ones. There were so many, and each one had a different name!
I encouraged the kids to use several colors to make their earths. Each one turned out unique!
Then I used stencils to make "We {heart} Earth!"
It was a great start to our Earth Day unit!
I wasn't planning on blogging about today's art project because it was just coloring, but when the kids finished their art a few of them asked, "Don't you want to take a picture of it?" So of course I did! I got the earth-heart idea from A Cupcake for the Teacher. I was just planning on having them color an earth and then cut a heart out of it, but then I found this awesome coloring sheet:
I love how it looks almost 3D. (You can find it here.) I went through my box of 120 crayons and took out all the blue and green ones. There were so many, and each one had a different name!
I encouraged the kids to use several colors to make their earths. Each one turned out unique!
Then I used stencils to make "We {heart} Earth!"
It was a great start to our Earth Day unit!
Friday, April 13, 2012
Chick in an Egg
Here is my last chick craft, I promise! I've seen these around the web, so when my boss walked in my room with a bag full of egg cartons and asked if I could use them for anything, I said Yes! I cut them apart and taped two together. One piece of tape went on the outside:
And one piece went on the inside:
Yesterday the kids painted the outsides with white paint.
Although, I don't really know how necessary that was because once the paint dried you could hardly tell it had been painted. Anyway, today we put wiggle eyes and beaks on medium-sized pom poms. The kids used a toothpick to apply the glue.
They put them on the top of the pom pom so the glue wouldn't run down, causing them to slide off.
Since there was nowhere to write their names, I let them dry on a piece of paper with the names under them.
Once the glue was dry, we plopped them in the egg!
I had planned on putting a drop of glue at the bottom so the pom pom wouldn't fall out, but the kids didn't want me to. They wanted to be able to take the chick out to play with it. Fine with me! They look so cute peeking out!
And one piece went on the inside:
Yesterday the kids painted the outsides with white paint.
Although, I don't really know how necessary that was because once the paint dried you could hardly tell it had been painted. Anyway, today we put wiggle eyes and beaks on medium-sized pom poms. The kids used a toothpick to apply the glue.
They put them on the top of the pom pom so the glue wouldn't run down, causing them to slide off.
Since there was nowhere to write their names, I let them dry on a piece of paper with the names under them.
Once the glue was dry, we plopped them in the egg!
I had planned on putting a drop of glue at the bottom so the pom pom wouldn't fall out, but the kids didn't want me to. They wanted to be able to take the chick out to play with it. Fine with me! They look so cute peeking out!
**Linking up to Show-n-Share Saturday!**
Thursday, April 12, 2012
Roly Poly Birdies
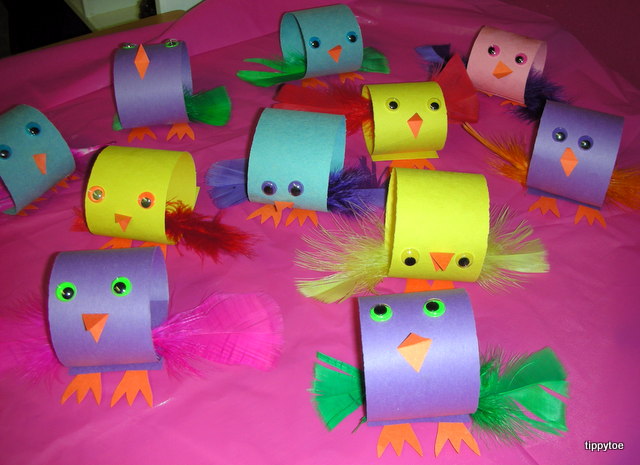
We made cute little birds today! I started by rolling up a 2" wide piece of construction paper and stapling it.
Then I cut out some simple bird feet and beaks. First, the kids glued the feet to the bottom of the roll, where the staple was.
Then they added some wiggle eyes (with a glue dot) and a beak. Finally, they chose two feathers and glued them to the inside of the roll to make wings. They could glue them anywhere on the inside, but most of the children glued the feathers to the bottom.
I think another feather sticking out of the back would have been cute, too. Like a little tail. You could stick it right in where the staple is.
But they are also cute as is, don't you think?
I loved looking at them all together, like they were in a nest calling out to mom, "feed me!"
Are you tired of all my chick/bird crafts yet? Because I will have one more to share with you tomorrow!
**Linking up to Sharing Saturday!**
Then I cut out some simple bird feet and beaks. First, the kids glued the feet to the bottom of the roll, where the staple was.
Then they added some wiggle eyes (with a glue dot) and a beak. Finally, they chose two feathers and glued them to the inside of the roll to make wings. They could glue them anywhere on the inside, but most of the children glued the feathers to the bottom.
I think another feather sticking out of the back would have been cute, too. Like a little tail. You could stick it right in where the staple is.
But they are also cute as is, don't you think?
I loved looking at them all together, like they were in a nest calling out to mom, "feed me!"
Are you tired of all my chick/bird crafts yet? Because I will have one more to share with you tomorrow!
**Linking up to Sharing Saturday!**
Subscribe to:
Posts (Atom)