Wednesday, August 8, 2012

Magnetic Paintings

We played around with magnets today. It was fun!
I knew I wanted to do an art project with magnets, kind of like marble painting, so I googled it to see what ideas were out there. I got the idea to use paper plates from Rockabye Butterfly. We used magnet wands with nuts and washers.
I thought having heavier metal objects would be better at dragging paint than something light like a paperclip. But some of the kids found it a little tough. So I just told them to take their time and go slowly. To start, I put blobs of paint onto a paper plate. (I let the kids pick two colors because if there were too many, it would end up just being brown.) They either put a nut or a washer on their plate.
Then they put the wand under the plate and dragged the nut or washer around the plate.
The design left behind was pretty cool.

The nuts left thinner lines and the washers made thicker ones. It was a fun way to combine science and art!


Tuesday, August 7, 2012

Paintings...With a Dash of Salt

Before I get to our beautiful art project, I want to show you what we did that led up to the project. We are doing a little science theme this week and today we did several experiments about dissolving. I got this idea from The Picky Apple. I brought in a few things for the kids to mix with water. I had three containers and the kids took turns and passed them around. We tried coffee:
Rice:
Magic Noodles:
Smarties (leftover from our Octopus craft):
Sugar and Salt, which you can't really see:
And white chocolate candy corn M&Ms:
Seriously:
Hey, I was just using what I had on hand. And BTW, these tasted awful. I got them because I love candy corn and my husband loves M&Ms. But no, no, no. So anyway, after all that, we ended up using the salt with our art. I saw this idea at The Joy of My Life. And although I don't think ours turned out as cool as theirs did, I still liked the results. We started by brushing water over white construction paper.
Then we painted with watered-down tempera paint.
Finally, we sprinkled regular table salt onto our paintings.
The salt made a really cool effect.
And as it dried it left some beautiful art.


I was hoping the salt would dissolve a little bit more, but it didn't. I started scraping it off, but it was too much work, so I left it. I actually really liked the technique of just painting on wet paper, so we might have to try this again without salt.
And maybe it was just the colors we chose. I think the pink, blue and purple are just stunning!

Saturday, August 4, 2012

Treasure Chests


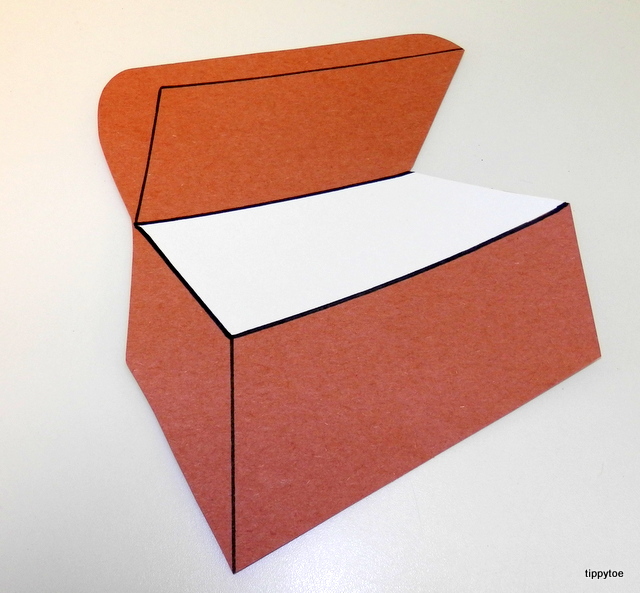
On Friday I asked the kids to bring in something special from home. Something that they would like to put in a treasure chest to keep safe. We had everything from jewelry to a Batman yo-yo. Then we did a little craft to go along with it. I made treasure chests by finding a coloring sheet of an open one and tracing it onto construction paper.
Then I added white paper for the "inside" of the chest.
It looked better once I added a few lines for dimension.
The kids could color treasure on the white part and decorate the chest with glitter glue.
Some kids drew what they had brought in to share that day, others drew things like gold and jewels.
The glitter glue pens were fun for the kids, but I reminded them not to squirt big globs. I told them to try to keep the pen moving while they squeezed.
Although my example was dry within a few hours, none of theirs was dry by the end of the day, so they will have to wait until Monday to take it home.

I hope you enjoyed our Pirate theme!

Thursday, August 2, 2012

Treasure Maps

Continuing with our Pirate theme, we made treasure maps today! I will show you mine first, then the kids'. I tore the edges of off-white paper to give it an aged look. Then I used crayons to make water and land and different "obstacles" like sharks and volcanoes. I included a little direction symbol in the corner and drew a dotted line with an X to "mark the spot."
I had printed out labels for the maps: Shark-Infested Waters, Snake Island, Volcano Valley, and Crocodile Creek. I wanted to keep it simple and the kids would be able to draw these things with basic triangles and squiggly lines. But before adding the labels, I crumpled up my map and smoothed it out again. Then I used a glue stick to add the labels.
To make it even easier for the kids, I drew pictures on little paper plates so the kids would know what the labels said.
That way I wouldn't have to answer the question, "What does this say?" over and over again. (Okay, so maybe I did this to make it easier on me, not the kids!) Then it was their turn. First they colored:
Then they crumpled and glued on the labels:
I tried to get each kid to make a cross with an N on top for North, and to make some sort of line with an X at the end. Other than that, they could color whatever they wanted.

They did a great job! The younger kids had a bit of trouble drawing pictures, but they had fun and their maps looked cool anyway!
We didn't make pirate ships this week because we made them for our transportation theme last fall.
Found out how we made them here!

Wednesday, August 1, 2012

Pirate Hooks

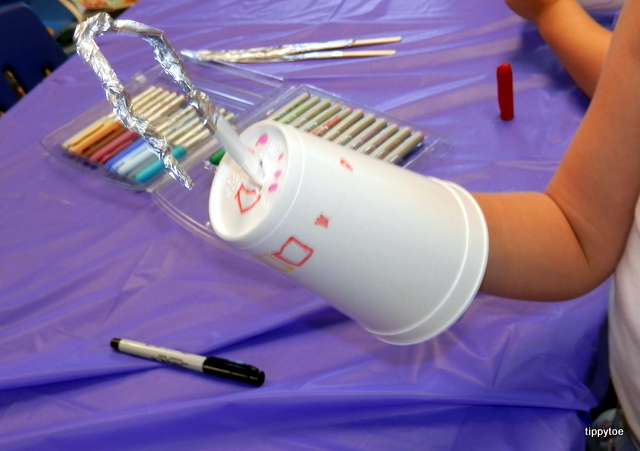
I'm sure I don't have to show you our pirate hook craft because it's been done several times over, but I'm going to anyway! I taped a craft stick to some aluminum foil,
and then rolled it up.
I used a little piece of tape to secure it. Then the kids squished and bent the foil into a hook shape.
And then they used colorful permanent markers to decorate a styrofoam cup.
I poked the craft stick through the end of the cup. The kids can put the cup over their hand and hold onto the craft stick.
And there you have another simple pirate craft. I promise tomorrow's will be a little more complex!