Saturday, February 1, 2014

Shadow Puppets

We studied shadows this past week, in honor of the upcoming Groundhog Day. I asked the kids to bring a flashlight to school on Thursday. Luckily it was a cloudy day so I was able to get the room pretty dark by just closing the curtains. We have a skylight in our room, so a sunny day would not have worked. The kids partnered up and found a spot next to the wall. They put their flashlights on a chair and shined them onto the wall. I had printed and cut out a bunch of shadow puppets (found at National Wildlife Federation Kids and at 100 Directions) and taped straws to them.
The kids took a few at a time to their spot and put on a little puppet show! It was hard to get pictures because they were all moving their puppets so fast, it was just a blur. But I got a few.
I used a hole punch on some of them (an idea I got from the website where I found the templates), which added a little special touch.

Here's little bunny Foo Foo and the good fairy!
Since we had our flashlights, we decided to have center time in the dark! Here's our coloring table:
And I put out Legos for the building center because someone brought in a Lego lantern, so we used it for our light.
And I printed out some simple worksheets of shadow matching (found here and here) and they did those under the skylight.
On Friday, we made footprint groundhogs.
Find out how we made them here.
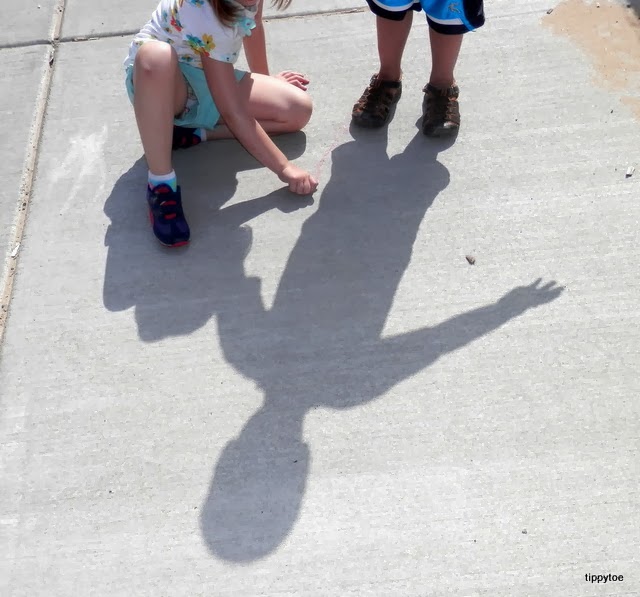
Another thing you could do with a shadow theme is take the kids outside and have them trace each other's shadows with chalk! We did this last summer.


This is something we can't really do in the winter here in the Midwest, but it was a lot of fun!

Tuesday, January 28, 2014

Reusable Snowman Building Activity

When I saw this snowman activity at Stir the Wonder, I knew I wanted to do something similar in my classroom. But I also thought it would be fun if the kids could make snowmen over and over again, and change things up each time! So I went to Jo-Ann Fabrics and bought three different sizes of styrofoam balls and a flat styrofoam base. I also picked out two small hats from the doll section that fit perfectly on the smallest styrofoam ball. (I glued on a paper flower to one of the hats.) Once I got to school, I went through all my craft supplies to find different things for the snowmen. I found buttons, star confetti, beads and wiggle eyes, but I wasn't sure how the kids would attach them to the balls. Remember, I wanted this to be a reusable activity, so no glue allowed! Then I thought of my brass fasteners. Perfect! I used a glue dot to attach the items to the ends of the fasteners!
This way the kids could stick them in the styrofoam and pull them right out again! I also made simple scarves from felt, used brown pipe cleaners for arms, and had long orange beads and orange pipe cleaners for noses. The kids used toothpicks to attach their first ball to the base and then to attach other balls on top. (Please note that toothpicks are sharp so supervision is a must with a younger group. My four- and five-year-olds did great and never poked themselves!)


The kids LOVED this activity! On Friday they were just as excited to go to this center as they were on Monday. They never grew tired of it! At first they all made traditional snowmen, with 3 balls, but by the end of the week they were getting a little more creative.

I'll definitely have to bring this out again before spring. We also had little snow cones with our afternoon snack to start off our Winter week on Monday,
and we finished the week by acting out one of my favorite books, Sneezy the Snowman by Maureen Wright. It's an adorable book with wonderful illustrations. Sneezy is cold and wants to warm up but he always ends up melting himself! When I read it, the kids always yell out "Make me brand new!" And the cardinals are hilarious! (Take a look at the inside of the book on Amazon. You'll fall in love!) So I picked a child to be Sneezy and the rest of the kids were the other characters in the book. SO CUTE!
I hope you all are staying warm wherever you are! Our schools have been closed the past two days because of dangerously low temps, but we head back tomorrow. I'm excited to get crafting again!
:0)

Thursday, January 23, 2014

Ice Skates and a Cup o' Cocoa

We are discussing the winter season this week and we did a couple crafts that were short-n-sweet, so I thought I'd combine them in one post. Today we made ice skates! I found a coloring sheet for an ice skate (here) through a google image search. I liked the skate, but didn't want the laces so after printing it out, I put another piece of paper on top and traced it, leaving off the laces but making dots where the holes should be. Then I copied that onto different colored card stock.
I cut them out and used a punch to put holes on the dots. First, the kids decorated their skate with snowflake stickers and markers.
Then they picked a color of yarn and "laced" their skate!
I taped it to the back to secure it before they started lacing. I also wrapped the other end of the yarn in tape to make it easier to fit in the holes. They always put the string through the hole from the back. Correction: that's the way I showed them how to do it and suggested they do it that way as well, but some didn't. No big deal. They were still getting fine motor practice out of it! Anyway, I again secured the end of the string to the back with tape.
Then the kids put the skate in a box and used a paintbrush to apply glue to the blade of the skate.
And finally they sprinkled on silver glitter.
We did this in a marble-painting box to contain the glitter. It worked great!


I found this ice skate poem at Frankly Creative, but I changed the first line:
These are the ice skates
I wear on my feet
to glide on the ice
then fall on my seat!
I printed it out and displayed the ice skates around it.
And now for the cocoa. I found a coloring sheet of a mug of hot chocolate. I didn't want the marshmallows, so I used white-out to get rid of them before photocopying them. The kids used watercolors to paint the mug.
 Then they used a paintbrush to apply glue to the inside of the mug (at the top).
 And then they sprinkled on hot chocolate powder.
After shaking off the extra powder, they added mini-marshmallows by dipping them into the glue and sticking them right on top of the powder.
It was a quick project that ended up smelling so good!


Tuesday, January 21, 2014

Polar Bears at Twilight

I saw this amazing art project at That Artist Woman that involved several techniques for texture. (You really should head over there and a take a look.) Unfortunately, I didn't have the important supplies, like watercolor paper, disc tempera paint and/or an ample supply of watercolors. So I had to change some things and also make it a little easier for my class, and although they don't look as cool, they are cute and were fun to make. So here is how we did it. The kids used a pencil to draw a horizon line on a piece of white construction paper. Then they painted the top part with very watered-down tempera paint.
While it was still wet, they stamped out the full moon the same way Gail did, by putting a tissue over the end of a cup and holding it there for 10 seconds, but we used a bigger cup. And I also held the tissue on with a rubber band so it was easier for the kids.

Then they painted the bottom with regular light blue tempera paint.
I really wish I had enough blue watercolor paint for the whole class, because Gail used plastic wrap to make it look like ice, and it definitely didn't work with liquid tempera paint. So we blotted it with a scrunched up napkin,
which looked fine when wet, but didn't look much different when dry. So if you have watercolors or tempera discs, use those because it is awesome! (Seriously, go look at Gail's pictures!)
When the paper was dry, the kids glued on the polar bears. Instead of using a stencil and painting them on, I cut out several bears (and baby cubs!) for the kids to use. They made eyes and noses with a black Sharpie.

I really wish I went with a darker blue and purple because they ended up drying much lighter. But honestly, next time I'll spring for the watercolors!