Before I begin, I wanted to let you know that I finally (finally!) have a facebook page for Tippytoe Crafts. This was really hard for me to do. I have been anti-facebook since the beginning, never even having a personal page. But since the point of my blog is to share my ideas, and using facebook might help it reach more people, then I guess a girl's gotta do what a girl's gotta do. I can almost guarantee you that I will only use my facebook page to link to a new post I've written. So if you already follow me here, you probably won't need to ever visit my page. But if you want to, click here.
Now on to the art.
Cherry blossoms. Don't you love them? Last year we made them with pink tissue paper (see that here), but this year I got inspired by Alphamom. I've used soda bottles for painting before, but I've never added a branch or tree. It was always for random flowers. But the one I saw on Alphamom was just so beautiful so I decided to give it a try. As the kids were dropped off in the morning, I had them paint a branch on a piece of white construction paper.
By art time, a couple hours later, they were dry enough to add the flowers. So I set out four shades of pink paint and added soda bottles. I used smaller bottles than the one from Alphamom because our paper was smaller.
The kids really enjoyed stamping with these.
And we got some beautiful art work for our wall.
I loved doing this (that first picture in this post is mine!) and want to make one on a canvas for my home. So don't be surprised if you see a cherry blossom young-at-heart craft from me soon!
Monday, March 19, 2012
Saturday, March 17, 2012
New Blog Design!
I am excited to show you my new blog design! I've been working on it for weeks. I will still be tweaking things here and there, but the majority of it is done. I need to thank Picnik for it's free services (I will miss them when they close), my niece Emmelia for providing a picture of her tippytoed foot, and my husband for using Photoshop to put it all together!
What do you think?
Please tell me if something isn't working or if it doesn't fit the screen or whatever. Thanks!
What do you think?
Please tell me if something isn't working or if it doesn't fit the screen or whatever. Thanks!
Friday, March 16, 2012
Lucky Treasure Hunt
We had a little leprechaun sneak into our classroom today! It was during nap time so nobody saw him. But he did leave footprints behind! He came in through the window and onto my desk.
Then he walked on the wall to our sink.
Then on the wall above our art shelf.
And finally left the room through the door. (The leprechaun probably would have walked all over our room if the children had slept longer! But he had to get in and out before anyone saw him.)
The kids were amazed to wake up and find these tiny footprints! But the leprechaun didn't just walk through. He left us a treasure. And clues to find the treasure.
The first clue was taped to my back. I have no idea how the leprechaun did that without me knowing! So there I was, looking all over for the first clue and the kids were screaming, "It's on your back!!" And I was spinning in circles trying to see what was on my back and they were all giggling. So fun! The clues were things like, "Go to the place where you put all your paperwork." Or "These toys are named after Abraham Lincoln." And the last clue, "This is where Miss Betsy keeps her scissors," led us to the treasure!
A bag o' gold, with an X to mark the spot! Ooh, I love Rolos, so I was pretty excited about this!
Then he walked on the wall to our sink.
Then on the wall above our art shelf.
And finally left the room through the door. (The leprechaun probably would have walked all over our room if the children had slept longer! But he had to get in and out before anyone saw him.)
The kids were amazed to wake up and find these tiny footprints! But the leprechaun didn't just walk through. He left us a treasure. And clues to find the treasure.
The first clue was taped to my back. I have no idea how the leprechaun did that without me knowing! So there I was, looking all over for the first clue and the kids were screaming, "It's on your back!!" And I was spinning in circles trying to see what was on my back and they were all giggling. So fun! The clues were things like, "Go to the place where you put all your paperwork." Or "These toys are named after Abraham Lincoln." And the last clue, "This is where Miss Betsy keeps her scissors," led us to the treasure!
A bag o' gold, with an X to mark the spot! Ooh, I love Rolos, so I was pretty excited about this!
Thursday, March 15, 2012
Leprechaun Lanterns
Today we made leprechauns! I saw this idea with a leprechaun made from a paper lantern and I thought it was so cute. So we made our own version today. I started with yellow circles for the heads, green hats with a black strip for a buckle, orange strips of paper for the beard, green strips for the arms, and small yellow circles for the hands.
The kids glued the hat to the head and used markers to make adorable faces.
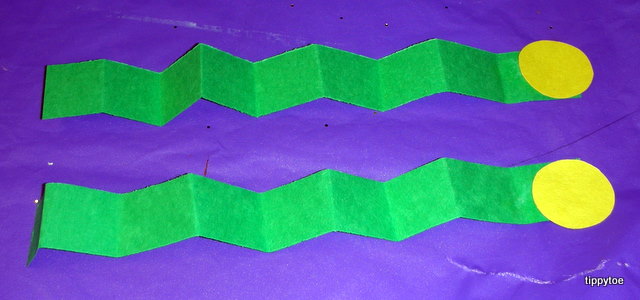
Then they glued the orange strips to the bottom of the face. (I got the idea to make a beard this way from The First Grade Parade.) Some of the kids were able to curl the strips with a pencil, otherwise I did the curling for them. They also added the black strip to the hat and I used gold glitter glue to make a buckle.Then the kids glued the small yellow circles to the ends of the green strips. Again, some of the kids could fold the strips accordion style, otherwise I did it for them.
Then I made a simple paper lantern and used a glue dot to attach the head and taped on the arms.
They really turned out cute. It was funny to see them all standing in the children's cubbies waiting to go home with them!
Wednesday, March 14, 2012
Pot o' Gold
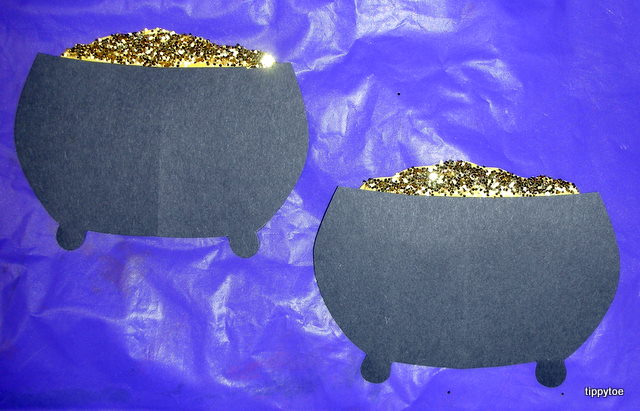
I took this potted rainbow craft from Mom on Timeout and combined it with this St. Patrick's Day craft from B.Inspired, Mama! plus added my own thing to come up with today's project. It all started with a pot of gold. I drew half a pot on folded black paper so when I cut it out, it was a symmetrical pot. Then I cut out some yellow "bumps" to use as the gold and glued it to the back of the pot.
In the morning the kids came over one at a time and painted glue onto the yellow paper, then sprinkled gold glitter on top.
During art time, I put out light blue construction paper (cut in half), colored popsicle sticks, glue and cotton balls.
The kids glued on the popsicle sticks really close together to make a rainbow.Then they glued their pot at the bottom of the rainbow.
Finally, they added some cotton balls to the top for clouds.
I was worried that each one would look exactly the same, but they didn't. Every child made it a little bit differently.
I was thinking of asking the kids what they hope to find at the ends of their rainbows, and then writing it on their projects, but I'm not sure yet. We'll see how crazy tomorrow is!
Tuesday, March 13, 2012
Smiling Shamrocks
Today's project actually took two days. Yesterday the kids painted shamrocks by mixing yellow and blue paint. I traced the clovers onto white paper and put blobs of paint right in the middle.
Using a paintbrush, the kids swirled it around until it turned green and then spread it around their paper.
I loved doing it this way because then each shamrock was a slightly different color!
Today I cut them out and the kids added wiggle eyes and a red piece of yarn for the smile.
Wait, I forgot a step. First use as much glue as possible, then add the eyes and mouth!
I trimmed the pieces of yarn that were too long.
Using a paintbrush, the kids swirled it around until it turned green and then spread it around their paper.
I loved doing it this way because then each shamrock was a slightly different color!
Today I cut them out and the kids added wiggle eyes and a red piece of yarn for the smile.
Wait, I forgot a step. First use as much glue as possible, then add the eyes and mouth!
I trimmed the pieces of yarn that were too long.
Can't help but smile when you see them, right?
Monday, March 12, 2012
Cookie Cutter Clovers
I didn't have any shamrock cookie cutters, but I did have some hearts. I saw this on Rockabye Butterfly and thought it would be a great activity for the kids. So I put 4 different sizes of heart cookie cutters in green paint.
We used light green paper and stamped 3 or 4 hearts in a clump and then added a stem with a paintbrush.
They turned out really cute!
It's definitely getting us in the mood for St. Patrick's Day!
We used light green paper and stamped 3 or 4 hearts in a clump and then added a stem with a paintbrush.
They turned out really cute!
It's definitely getting us in the mood for St. Patrick's Day!
Subscribe to:
Posts (Atom)