Showing posts with label shadows. Show all posts

Thursday, February 5, 2015

Valentine Birdies and Silhouettes

I saw this cute door display at Life In First Grade. It was a bunch of birds on tree branches and the teacher called them her "tweethearts." I decided to do something similar with the kids. I found a bird template here, enlarged it and traced it with different colored markers. The kids painted the birds with glitter watercolors.
When they were dry, the kids added a heart folded in half for the wing and a smaller heart for the eye.
Then I cut them out.

I displayed them in the hall with some small hearts and titled it Ms Betsy's Tweethearts.

I also wanted to show you the silhouettes we made last week when we had our shadow theme. I cheated and took pictures of the kids instead of trying to trace their shadows. (I've done that in the past and it's really hard to do because they are always moving!) Then I printed out the pictures as 8x10s (in draft mode to save ink), cut them out and used them as templates. The kids used heart cookie cutters to decorate white paper and then I put their silhouette on it.
I like how it looks like they are thinking lovely thoughts.

To see other silhouette ideas, go here and here.

Saturday, February 1, 2014

Shadow Puppets

We studied shadows this past week, in honor of the upcoming Groundhog Day. I asked the kids to bring a flashlight to school on Thursday. Luckily it was a cloudy day so I was able to get the room pretty dark by just closing the curtains. We have a skylight in our room, so a sunny day would not have worked. The kids partnered up and found a spot next to the wall. They put their flashlights on a chair and shined them onto the wall. I had printed and cut out a bunch of shadow puppets (found at National Wildlife Federation Kids and at 100 Directions) and taped straws to them.
The kids took a few at a time to their spot and put on a little puppet show! It was hard to get pictures because they were all moving their puppets so fast, it was just a blur. But I got a few.
I used a hole punch on some of them (an idea I got from the website where I found the templates), which added a little special touch.

Here's little bunny Foo Foo and the good fairy!
Since we had our flashlights, we decided to have center time in the dark! Here's our coloring table:
And I put out Legos for the building center because someone brought in a Lego lantern, so we used it for our light.
And I printed out some simple worksheets of shadow matching (found here and here) and they did those under the skylight.
On Friday, we made footprint groundhogs.
Find out how we made them here.
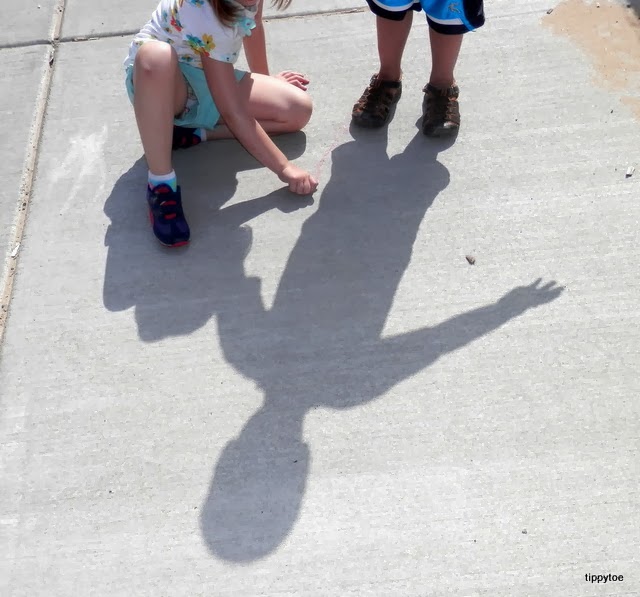
Another thing you could do with a shadow theme is take the kids outside and have them trace each other's shadows with chalk! We did this last summer.


This is something we can't really do in the winter here in the Midwest, but it was a lot of fun!

Friday, February 1, 2013

Peek-a-Boo Groundhogs

I have a simple and cute groundhog craft to share with you today. I printed some coloring pages of groundhogs (found here and here), cut them out and had the kids color them.
Then each child got a half piece of white construction paper and drew either a sun or cloud at the top. (Actually, all my kids drew a sun, but they had the option of drawing a cloud.) For the bottom half of the paper, they covered it with glue and cotton balls to make snow. We just had a snow storm so we have plenty of snow on the ground now! But if you live somewhere warmer, you could easily make grass at the bottom by using easter grass.
When it was dry, I cut a slit right above the cotton balls and attached a big craft stick to the groundhog. At first, their paper just looks like it's a sunny day with snow-covered ground.
But when you slide the groundhog through the slit, up he pops, looking for his shadow!
 
The kids took them home and will find out tomorrow if what they predicted comes true!

Thursday, January 31, 2013

Another Twist on Silhouettes

Last year for our Groundhog/Shadow theme, we made Silhouettes with a Twist. Instead of a black head and colored background, the kids had a very colorful silhouette with a black background. I loved it, but I wanted to do something different this year. Here's what we did:
I got the idea for the "halo" look from Housing A Forest, but we did things differently. (Mainly because it had been so long since I read the post that I forgot how they did it.) First I traced the kids' heads onto pink construction paper. This was a little tricky, as they move and giggle quite a bit! Then I cut out all the heads before we started the project. At the art table, I used that sticky blue gooey stuff for hanging things on walls to attach the head to a piece of white paper. Then the kids used oil pastels to make lines from the pink paper to the white paper, all around their head.
They could use one color or several colors. I told them to keep the lines close together so there wouldn't be any huge spots of white.
Then they used a tissue to smear the oil pastels, again starting on the pink paper and moving to the white.
The smearing actually worked better when the kids drew their lines lightly, instead of pressing really hard. When all the smearing was done, I removed the pink paper.
I kind of wish I gave all the girls ponytails or something so they wouldn't look so bald, but they all turned out very cool, in my opinion.


I might use this technique again for other things. It was pretty easy for the kids to do by themselves. A few of the younger ones had trouble smearing with a tissue, but they eventually got the hang of it.

Wednesday, February 1, 2012

Silhouettes (With a Twist)

We are experimenting with shadows this week to get ready for Groundhog Day tomorrow. The kids brought flashlights to school today and we made shadow puppets, which were a lot of fun! I also used the flashlights to trace their profiles on a piece of white paper. I used a pencil, because if they move just a tiny bit you almost have to start over, but I traced over the pencil line with a black Sharpie.
But instead of just cutting these profiles from black construction paper, as cool as that looks, I wanted the kids to do something different. So they each colored a coffee filter with markers. Then they put the filter on top of their profile and sprayed it with water.

They loved watching all the colors bleed together! After about 10 minutes, I took off the coffee filters to reveal the beautiful designs they left behind.

Then I cut them out and taped them to black paper. This really made them stand out.
I also put a little card in the upper left-hand corner with a question mark on it. I wanted the parents and other teachers to guess whose profile it was. Then they can open the flap to see if they are right!
My favorite part was hearing the kids talk about the colors. Several of them noticed they had colors on their paper that they never colored with originally! For instance, this girl only used purple and green markers. She was so surprised to see yellow after we took the coffee filter off.
Oh, I just love it! I wish I had traced their entire heads instead of just the faces, but it was hard for them to sit still!