Showing posts with label fall. Show all posts

Sunday, September 18, 2016

Handprint Apple Craft

Here's a simple apple craft I made with the kids recently.
They painted a small paper plate by dipping a pom pom into red paint and dabbing their plate.
I painted their palm and fingers green (for a leaf) and their thumb brown (for a stem) and made a print.
I cut out the handprint when it was dry and glued it to the top of the plate.That's it!
Easy and cute!

Tuesday, November 10, 2015

Nature Faces

Before I get to the art project today, I wanted to update you on my job situation. If you were reading this blog back in May, you know I left the center I was teaching at and stayed home with my daughter for the summer. At the end of the summer, as I applied for new positions, I realized I didn't want to teach in a center anymore. So I became a nanny for a wonderful family instead. They have a 3-year-old daughter and an 18-month-old son. My daughter is 2-and-a-half so she fits in nicely. Although I love teaching and often miss being in a classroom, I am very happy with my decision. And I still get to do a lot of what I did in the classroom anyway. (But no more class displays -- boo hoo.)

Now on to the art...
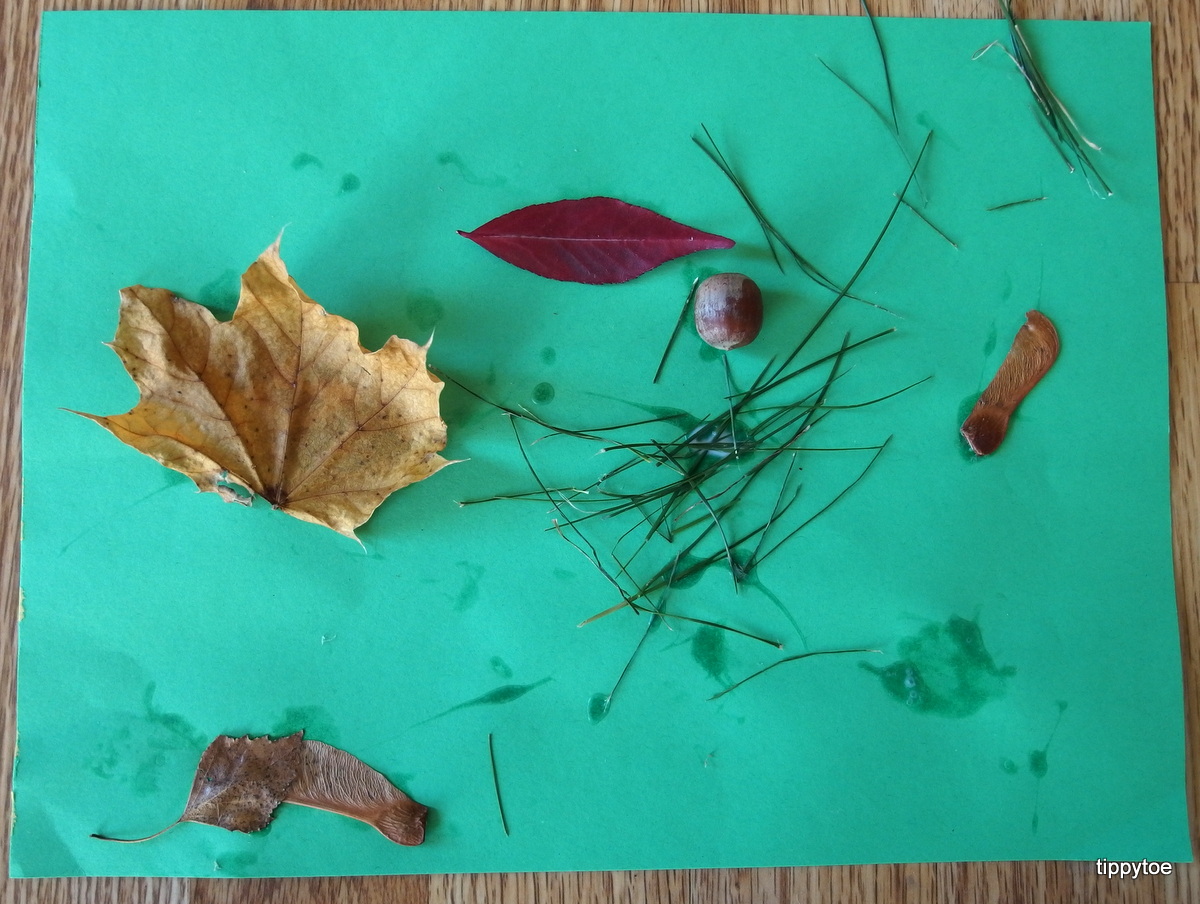
I noticed the red leaves from a burning bush looked like lips, so I thought it would be fun to make faces out of things from nature. Most of the leaves have already fallen off the trees where I live, but there are a few still hanging on. We took a walk to collect some items that we thought would be good for our project. Then we got to work gluing the items on to resemble a face.
I put markers out to add in other details, but it's not necessary. Here's one I made before I drew anything in:
And then after:
It just adds a little something. We had a lot of fun!


And the little one just made a collage.
This art won't last forever, but it's a wonderful activity to do on a beautiful autumn day!

Thursday, October 8, 2015

Button Pumpkin Patch

Since I had so many buttons left over from our fall tree craft, I decided to use some orange ones in a pumpkin patch craft.
First you use glue to make some squiggly lines on green paper.
Then you put green yarn on the glue.
My daughter is only 2 so she didn't really line up the yarn on the glue, but I just waited for her to put the yarn where she wanted it and then squirted some glue under the yarn in a few places. Older children might be able to follow the glue line with their yarn.
Then glue on orange buttons of all different sizes. You can follow along the yarn or, like my daughter did, glue them anywhere!

After it dried, I realized it was missing something. Leaves! We added those by scrunching up green tissue paper squares and gluing them randomly on the paper.
And there you have it, a button pumpkin patch!

Thursday, October 1, 2015

Fall Button-Tree Craft

Fall crafts are my absolute favorite. The colors are so beautiful. I've been wanting to make a fall tree with buttons for awhile now, but I couldn't find a big, inexpensive bag of fall-colored buttons. You'd think it would be easy, right? So I eventually broke down and bought single bags of buttons in five different colors. I love button art, so I know I'll be able to use them for many other crafts. I had planned on painting a tree, but then I found this pack of foam trees at Target:
I loved how whimsical they were. So I let my daughter pick which tree she wanted to use and I glued it to a piece of 12x12 blue scrapbook paper. Then I combined a bunch of buttons in a container. She put some glue on the tree and the paper and started adding buttons. She loved this activity!
I thought she might get bored after awhile so I had planned on leaving it out for her to come back to later in the day, but she kept on going until it was all filled!
Picking up all the buttons and placing them on the glue was great fine motor practice for her. And when she was done, she helped me sort all the buttons by color.
 When it was all dry, we had a beautiful fall tree!
And while she was working on that, I was working on my own craft. My husband bought me this pretty leaf necklace.
It's a real leaf with a copper finish. He knew I probably wouldn't wear it because it was so big, but he also knew I could do something with it. So I bought a rustic frame, took the leaf off the chain, added a couple glue dots, and I had a beautiful fall decoration to add to my collection!
I left the glass out of the frame and glued it to a piece of card stock paper. I wasn't sure if glue dots would work, but it's still holding on a few days later. I love it!

Wednesday, October 29, 2014

Full Moons, Spinning Ghosts and Creepy Spiders

I'm falling behind on my Halloween crafts, so I have to combine a few in one post. I'll try to keep it short! Back when we made scarecrow silhouettes, I had a hard time deciding if I wanted to make them with sunsets or full moons as the background. I finally realized that I should save the full moon for a Halloween craft. But this ended up being more of a fall craft. Anyway, I drew a big circle on white paper, making it the size of a coffee filter. Then I squirted white and yellow paint in the middle of it and the kids mixed it up and spread it around the circle.
 Then I placed a coffee filter right on top of it and the kids pressed down a bit.
(Sorry about the ghostly hands!) After only a minute or two, I peeled it off. This gave the moons a little texture, which didn't really show up on camera, but it was there! When they were dry I cut them out and glued them to a piece of black paper. The kids painted trees and hills and anything else they wanted onto their paper.
I had also used a stencil and cut out some bats, cats and owls for them to glue on.


The black paint made the moon curl up a bit, as well as the black paper itself.
I just used some double stick tape under the moon edges and then flattened the whole thing between two heavy filing containers.
Earlier in the week we made spinning ghosts to hang in our room. I drew a very simple ghost pattern onto white paper and gave it a long "tail." I cut out the ghost part because I knew that would be difficult for my kids to do themselves.
So all they had to do was cut out the rest of the tail and draw in a face on both sides.

Last week we made spider rings.
I got the idea from Fantastic Fun and Learning so go there for directions. We made the small ones and only used one pom pom. I hot glued the pom pom on, but the kids used tacky glue to add the wiggle eyes. They LOVED them!
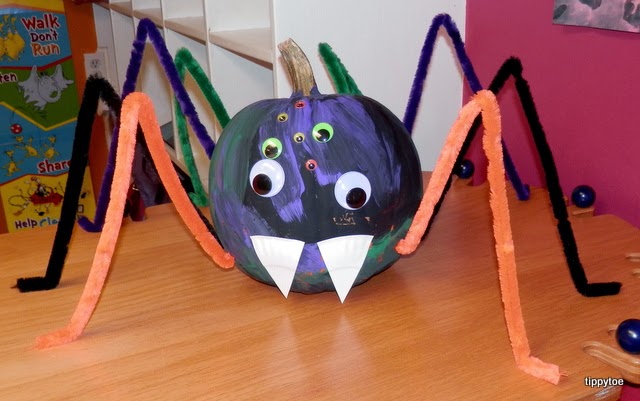
We also went on a field trip last week and picked out a pumpkin for our classroom. The kids painted it black, green and purple and then we made it into a spider. We glued on 8 wiggle eyes and two fangs cut from a small paper plate. I used large pipe cleaners for the legs and stuck them right into the pumpkin.
I must have been on a spider kick because over the weekend my daughter and I made a garbage bag spider. She was a really good helper when it came to filling the bags with leaves! I used electrical tape to tape the two bags together, glue dots to attach the wiggle eyes (I decided to just do 4 since not all spiders have 8 eyes), made the fangs from a paper plate again, and used JUMBO pipe cleaners for the legs. I used electrical tape to attach the legs as well. It now sits in the bare spot where all my roses used to be, waiting to greet trick-or-treaters!
I don't know if he's weather-proof, but luckily it's been a dry week and the legs are holding up just fine. I did use a few tent stakes to keep some of the legs in place, but even those without a stake are still standing. Yay!

Friday, October 24, 2014

Hedgehog Craft with Fall Leaves

I finally did a craft with my daughter, Elise. It was so fun! She's 19 months and although I've done plenty of hand and footprint art with her and she's done many crafts at day care, this is the first one we've done together. Mama and baby hedgehogs:
Cute, right? A teacher at my center made these with her 3-year-olds. I loved them but didn't want to have my class copy them, so I decided to make them at home with Elise. One beautiful evening we went for a walk and collected leaves. Then it was time to get crafting. Elise was very excited and couldn't wait to start painting.
We used paper plates, but regular paper would work just fine. I started with half a plate and cut out a hedgehog shape. I did the same thing with a small paper plate for Elise. Then I mixed red and yellow paint to make orange and we began to paint our plates.
When we were done, I put glue on the plates so we could attach our leaves.

Then we added wiggle eyes.
Elise got a little carried away with the eyes, but that's okay! And finally, we added a small pom pom for the nose.

We both had a blast and since that night she keeps pointing to the smock because she wants to do more art! Ahhh, that's my girl.
Fun Fact: Hedgehogs got their name because they prefer to live and eat in and near garden hedges, and they grunt like a pig when they hunt.