Thursday, December 8, 2011

Play-Dough Arches

This is just a quick post to share our project for our latest stop on our USA road trip -- the Gateway Arch. Normally, this wouldn't be blog-worthy, but in case there are others out there interested in doing a landmark theme, here's an idea. We used play dough to make arches. Simple, right? And you know kids love working with play dough.
I put out all the play dough accessories, but I asked the kids to make an arch before making their own creations. They were happy to oblige.

This one even had a princess:

Wednesday, December 7, 2011

Torn-Paper Grand Canyons

Today on our road trip, we visited the Grand Canyon! I showed the class beautiful pictures and pointed out the different layers of colors.
(Photo source: Smithsonianmag.com)
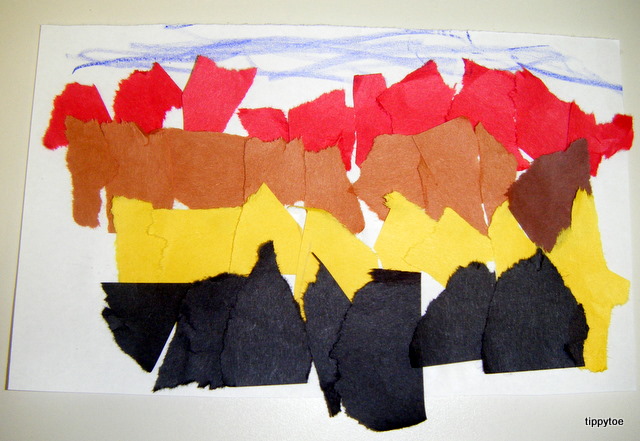
Our art project was so simple, and I actually thought it up that morning as I was looking around our room. (I had planned on the kids doing a painting of the Grand Canyon, but I liked this idea better.) I spied our big bucket of scrap paper and it clicked -- they could tear up paper and glue it on in layers! So that's what they did.
I told them to try to overlap the bottom of each layer with the new layer. I also said they could use any colors they wanted.
When they were done, they colored the sky blue.
I wrote "My Grand Canyon" at the bottom of their papers. It was such a simple craft, but had amazing results!


Tuesday, December 6, 2011

Gingerbread House Class Display

I love putting up a class display in the hall for everyone to see, especially for the holidays. I'm still working on this year's Christmas display, so I thought I'd share one from a few years ago. It's a big gingerbread house and I put the kids' faces inside little gingerbread people. I had a small class that year, so it was pretty simple. Here it is on my living room floor:
The house and people and many decorations are made from felt. Then I glued the whole thing on a big piece of red paper so I could staple it to the wall in the hallway. I used stiffened glitter felt for the words and gum drops. I used white fluffy glittery material for the snow. Some of the decorations are foam stickers, like the candies above the door. The candy canes on the sides of the door are made from pipe cleaners twisted together.
I use styrofoam balls cut in half for the snowman and tiny black felt squares for his eyes and mouth.
I like how the gingerbread boy stacked two gum drops so he could put in the snowman's nose!
I used silver glittery pipe cleaners to make icicles hanging from the roof.
And I used beads for ornaments on the tree.
I also used real mini christmas lights (yes, they really worked!) and strung them through from the back. I taped the battery pack to the back, but down low so I could reach it from the front to turn them off and on.
And all the gingerbread people were decorated with puffy paint. It was so fun to make!

Mount Rushmore Heads

This week my class is taking a road trip across the United States. First stop: Mount Rushmore! I've been there myself, so I was able to bring in all my pictures. A girl in my class has also been there and she brought in her pictures as well. I taught the kids a little bit about the four presidents and then showed them what the craft would be. I got this idea from somewhere, but I have not been able to find that website again. I first found it about 4 or 5 years ago, so maybe it's no longer up. I wish I could find it to give proper credit, but I will show you our craft and maybe one of you will recognize it and can tell me where it's from.
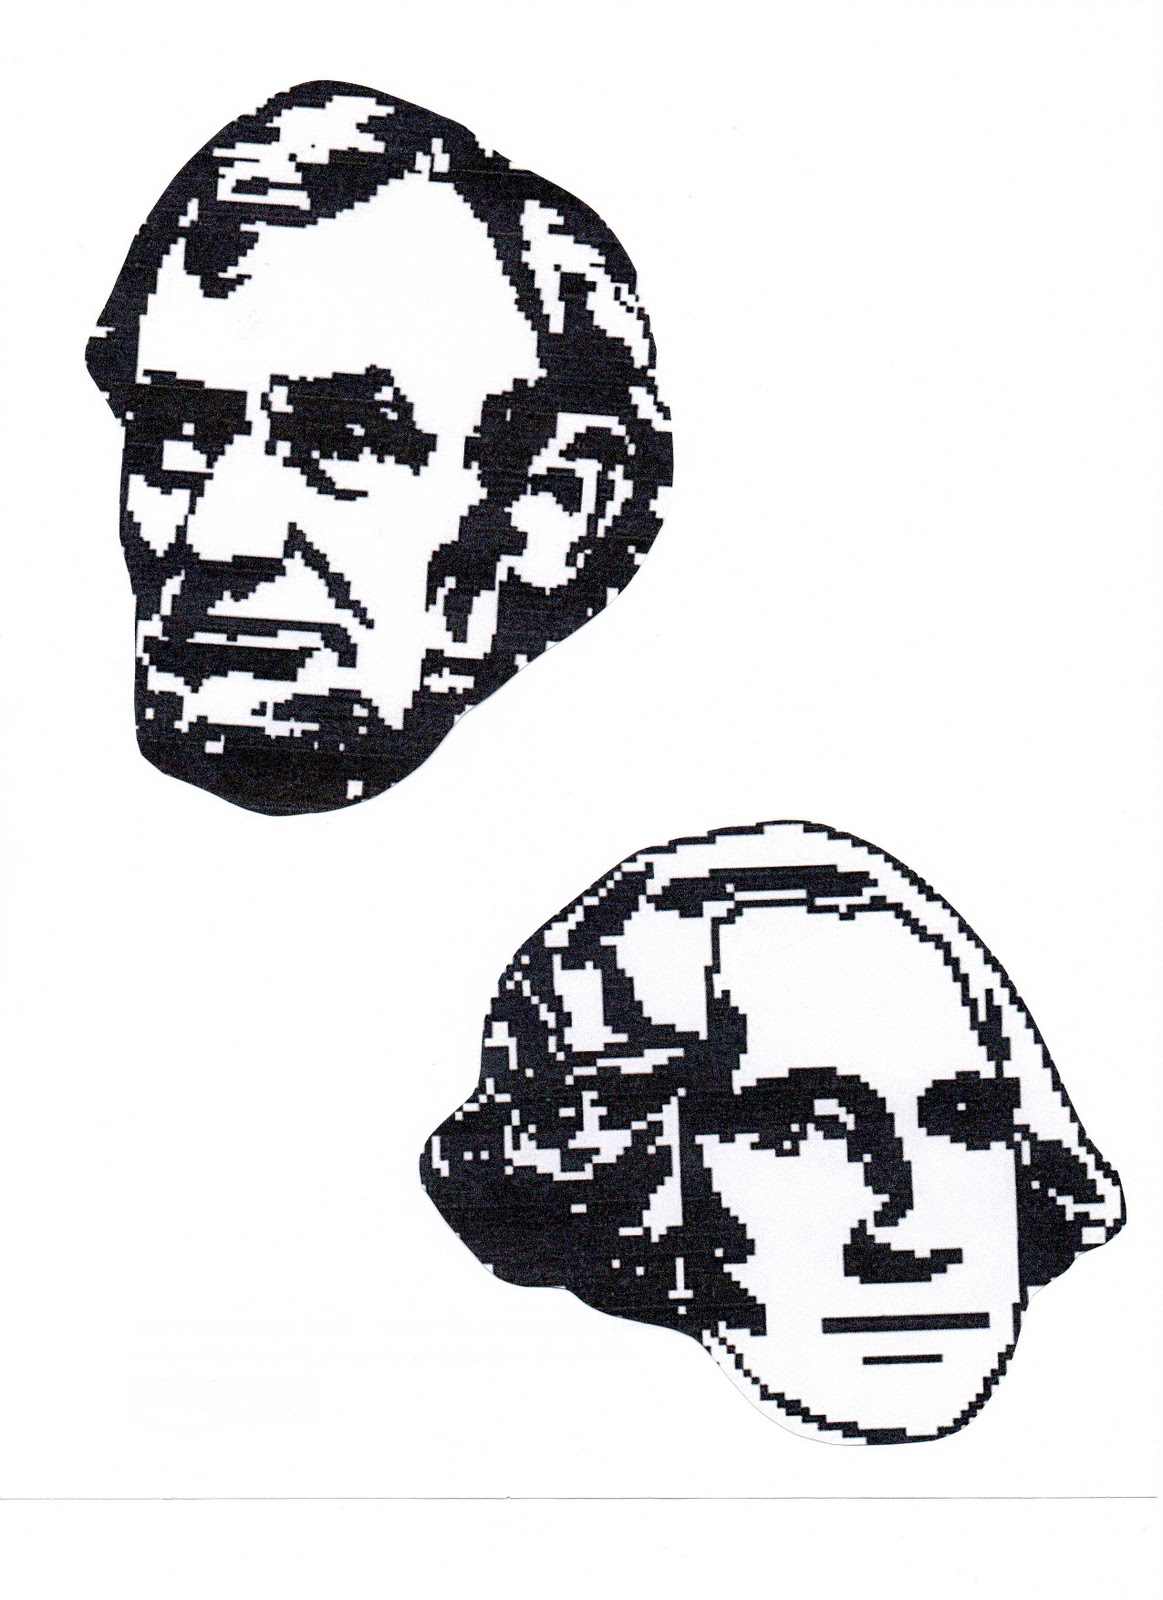
First I found pictures of the four presidents that were highly pixelated so they'd resemble rock carvings. (At least to me they do.)
After printing them out, I taped them to construction paper to make them sturdy, then cut them out. The kids then had to decide which president they wanted to be, and then they colored the OTHER 3 presidents. (This was a little difficult to understand. "But I want to be Washington! Why can't I color Washington?" But they soon figured it out.)
I cut the middle out of paper plates, and stapled the president heads onto the plate in the correct order, using the plate as the "missing" president. Then the kids stuck their heads through the plate! Here's our Washington:
Our Jefferson:
Our Roosevelt:
And our Lincoln:
I also taped a craft stick onto the plate, but it was still pretty floppy. A jumbo craft stick would probably work better. We spent all day practicing the names of the presidents so the kids could go home and tell their parents!
I was planning on giving you the name of the website where I found the president heads, but that's no longer available, so I scanned mine in. I'm leaving them full size so you should be able to print them any size you want.

Saturday, December 3, 2011

YAH: Candy Cane Wreath

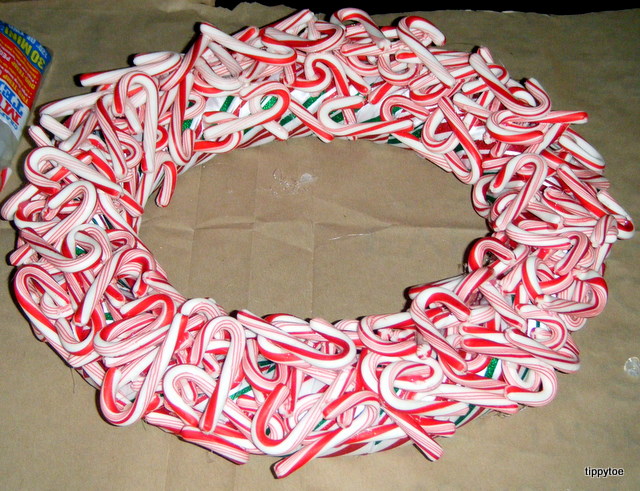
Even though it's been raining here, I'm trying really hard to get in the Christmas spirit. So I'm here to share with you a candy cane wreath. I had seen several candy wreaths online that I liked (here and here), but my inspiration was from here. I used a foam wreath from Michaels, some Christmas ribbon, a whole bunch of mini candy canes and some Christmas ball thingys (I don't really know what they were). I wrapped the ribbon around the wreath so I wouldn't have to worry if it showed through gaps in the candy canes. Then I began hot gluing the candy canes all over, in every direction.
I kept going with the candy canes until I was happy with the coverage. I had originally bought two boxes of candy canes, but then the next day I sent my husband out to get two more boxes because I was worried I wouldn't have enough. But I ended up using less than one of those, so total I used about 2-and-a-half boxes.
I glued some candy canes to the sides of the wreath, but not too far down.
Then I made a bow with the same ribbon (with the help of my Bowdabra). I also started gluing on red and green ornament things.
They were in a clump so I had to cut them apart. I really have no idea what they are supposed to be for, but they worked perfectly for this. I used mostly red with only a few green. Then I glued on the bow.
I gave this to my mom, but because it's made of candy I don't think it can be stored and brought out again every Christmas. Anyone ever try storing a candy wreath before?

**Linking up to Centsational Girl!**

I Got An Award!

Carrie at Crafty Moms Share gave me the Liebster Blog Award!
She actually gave it to me several days ago, but I'm just now getting around to blogging about it!
The goal of the award is to spotlight up-and-coming blogs with less than 200 followers. The rules are:
  1. copy and paste the award on your blog
  2. thank the giver and link back to them
  3. reveal your top 5 picks and let them know by leaving a comment on their blog
  4. hope that your followers will spread the love to other bloggers
Here are my five picks:


I hope you will check them out! Thanks for your support, Carrie!

Friday, December 2, 2011

Handy Hermit Crabs

Today's Eric Carle book was A House For Hermit Crab. I had seen this amazing project at I Heart Crafty Things and couldn't wait for our Eric Carle theme so I could do something similar. My class did a much simpler version, only because I had a room full of kids and a limited amount of time. We started with a hand print with red or pink paint. As that dried, the kids painted small paper plates with watercolors. I had cut part of it off where the crab would go, and I drew in a swirl to make it look like a shell.
Then I had them draw an underwater scene on light blue paper using oil pastels.

I reminded them that their crabs would cover much of the paper so they should decorate the sides and top and bottom of the paper. I used small pieces of pipe cleaners for the eye stalks and just attached them to the hand prints with masking tape. Then I used glue dots to attach the wiggle eyes to the eye stalks. The plate was glued down with Elmer's glue along the ridge of the plate, and the hand was taped in place.

I love how they turned out! I displayed them on the wall in our room and all afternoon I couldn't stop staring at them. They are just so stinkin' cute!
I was also thinking it would be neat to some how have the hand print inside the shell and be able to pull it out. Maybe next time.

UPDATED 11/19/14:
We made these again this year and they are just too cute not to share. I traced the kids' hands this time instead of making a print. And we used Crayola watercolors to paint the plate (instead of generic paints that we used above) and they turned out so much brighter!


Fun Fact: Hermit crabs are not really hermits. They are social creatures and can usually be found in groups of 100 or more.