Friday, July 8, 2011

Marshmallow Eiffel Towers

Yesterday the class went to France! We talked about the Eiffel Tower and then the kids went to the art table to construct their own towers.
With toothpicks and mini marshmallows (we used fruity ones!) they could create any type of structure. It didn't have to look like the Eiffel Tower, obviously. As much as I hate to use styrofoam (that's all our center uses), it helped to have it as a base because you could stick the toothpicks in to support the tower.
There were some pretty creative structures!
And today I used those marshmallows as prizes when we had a quiz about all the places we visited in Europe this week. (Today we went to Spain, but our art project was just paper airplanes -- they colored the paper, I folded them into airplanes and then we flew them across the room -- so I didn't think it was blog worthy.)


Sun Prints


This is a great activity to do in the summer. I bought this Sun Print paper from Amazon. You can use any objects you want, but keep these points in mind: If the object is too light, it may blow away or move around. If the object is too thick, it will create a shadow. If you aren't fast enough when putting the objects down, or if you rearrange them, it will not work as well. You need to be fast! That said, this is how we did it. I took 4 kids outside at a time. They were able to choose some foam shapes.
I held onto the special paper, still in it's black pouch, while I explained the directions. As soon as I gave them their paper they were to put on their foam shapes, slap down their hand in the middle, and NOT MOVE! After just a few seconds you could see the blue paper fading to white. After about 2 minutes I grabbed the paper and flipped it upside down so it would no longer be exposed to the sun and we went inside. Then I filled a plastic container with water and rinsed the paper (following the instructions). During this time, the lighter blue changed back to dark blue and the dark blue shapes changed to white, or lighter blue. As they dried, they got darker and darker. These were the results:


I don't think they turned out as well as in the past. I've never used this brand before and I've never used foam shapes or hand prints before. In the past we've used heavier objects and did it in the shade so there wouldn't be shadows. Maybe the foam pieces were too light and that's why they aren't as white. Maybe some light actually got underneath them. I don't know. The kit does come with a plastic cover to put over your objects, so you can use flowers and leaves, but it only comes with one and I didn't want to take the kids outside one at a time. I do think these would be cool with stars and planets and other space objects. I would love to do it for my Space theme, but I always do that in winter. Yes, we have sun in winter, but we also have snow and very low temperatures. Not exactly the best time to do a sun experiment outside!

Wednesday, July 6, 2011

Mona Lisa Paintings

Continuing with our trip to Europe, today the Pre-K class went to Italy! I talked a little bit about the Italian artist Leonardo da Vinci and his Mona Lisa. I found a coloring sheet of the Mona Lisa at Enchanted Learning.
The kids painted it with watercolors. When they were dry I framed them with construction paper. It was a little hard to do because once the paper was painted, it wasn't flat anymore. If I was patient, I would have flattened them overnight, but I was eager to put these on display. Before hanging them, however, I asked each child why Mona Lisa is smiling! I wrote down their responses and attached them to the frames.
I displayed them in the hall right outside our room.
It looks great and the parents loved the responses! And the kids got another stamp in their passports, of course!

Fireflies

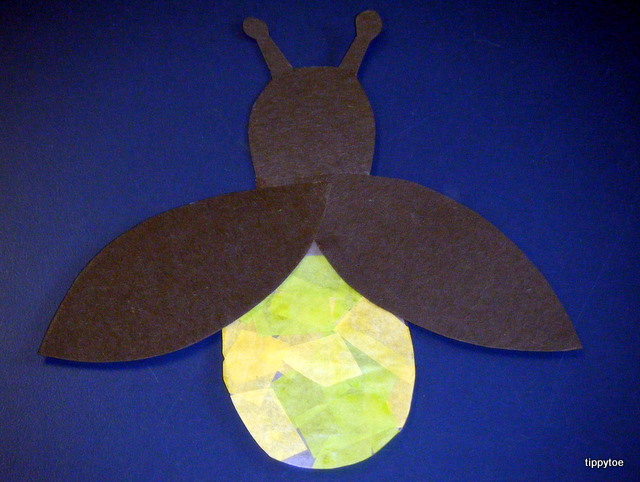
Ahhhh, summer. Who doesn't love seeing fireflies? Or do you call them lightning bugs? They are summer's night lights and I'm sure most of us have childhood memories of catching these creatures and putting them in a jar. There was no way I could do a unit on summer bugs and not include these fellas. First I made a firefly head out of black construction paper. Then I made a teardrop-shaped body out of wax paper. (You could also use contact paper or laminating sheets.) The kids glued the wax paper onto the head.
Then they put glue on the wax paper (using a glue stick) and stuck on yellow and green tissue paper squares. Once it was filled, they flipped it over and glued on wings.

You can trim the tissue paper if it hangs over the wax paper. And you can also add another sheet of wax paper on top so it's smooth on both sides. I hung them on the windows beside our door. When the light is off in our room, it looks really cool.
Much cooler than that picture shows.

UPDATE: I took down the fireflies today to send home. But before putting them in the mailboxes, I attached a mini flashlight from Oriental Trading. I used a glue dot and stuck it on the back.
When you push the button to turn on the flashlight, the light shines through the tissue paper.
The kids love that their fireflies actually light up!
Fun Fact: Male fireflies fly in the air when flashing (their way of communicating to find a mate) and females stay in bushes and grass. Each species has its own specific flashing pattern. The male seems to say, "Hey, don't you think I'm cute?" And the female will say, "Sure, come down for a date!" However, some species of female fireflies will play a nasty trick on the males. They will flash a signal so a male comes down and then eat him up!

Tuesday, July 5, 2011

Passports

To go with our Europe theme this week, we made passports!
The cover was some clip-art from a greeting card program I own, and I added our center's name and Pre-K to the bottom. I made the little books by folding a piece of red paper in half then adding white paper to the inside and stapling it. Before I did that, though, I printed the passport information on the red paper. It has their name, date of birth, and the date issued. Then I made a space for them to "sign" their name and added a small picture to the corner.
I also printed out a bunch of travel and landmark clip-art and cut them up.
I printed them on label paper so they would be stickers. I didn't want the kids to use glue sticks because I thought the pages might stick together. They picked out a few stickers to place in their passport.
And then I stamped it and wrote what country they visited. Today it was Germany.
Tomorrow it will be Italy!

Dramatic Play Airplane

So this week, the Pre-K class is going to Europe. In our imaginations, anyway. Several years ago I made an "airplane" out of a box. It's really just the sides of one, but it works just fine. I dug it out of storage and it's a little bent up, but it still serves it's purpose.
So it's made out of a normal cardboard box, but then I covered it in gray paper and used black construction paper for the nose and windows. I made a slit for the wing to go into, but it still needed a little tape to stay up. And I also printed out "Pre-K Airlines" on gray paper and glued it to the plane.
I made 2 of these and put 4 chairs in between them to make the seats on the plane. The sides of the plane are just leaning against the chairs. It's that simple! Then I made a pilot hat out of a McDonald's hat that we already have, put in a suitcase, and put a beach ball globe nearby. The kids can look at the globe to find out where they want to go and fly away...
(The kids were in their swimsuits because we were going out into the sprinkler later, so that's why it looks like they hardly have any clothes on!)

Friday, July 1, 2011

July 4th Party Hats

Can you believe it's July 1st already? And a hot one to boot! Whew! The kids made party hats for the big Independence Day weekend.

First I took big construction paper (in red, white and blue) and cut some strips from the top half, leaving every other strip.

It looks like a birthday cake, I know. Notice what a terrible job I did cutting. It doesn't have to be perfect. Or even almost close to perfect. I could have taken the time to measure each cut, but why? Anyway, the kids glued some star cut-outs onto the tops of the strips. This is necessary to weigh the strips down. Notice these stars are glued to the BACK of the hat, where the children write their names. Then they flip it over and decorate the front.
I had written out "Happy 4th of July" on a piece of paper for the kids to copy (if they wanted to). Then they could glue on more stars and decorate it. Those smaller stars were made with hole punches. Once the glue was dry, I added a small piece of paper on the side (because they weren't quite long enough to fit around the kids' heads) and stapled it. Now those strips bend down, almost looking like fireworks (I think) and even bounce as the kids move.

If they don't seem to be bending enough, just roll them down and hold for a few seconds, then let go. That should do it.

The kids had fun making these and wore them most of the day.


And now, a three-day weekend. Ahhh......