Sunday, March 11, 2012

YAH: Spring Wreath/Summer Wreath

This post has been updated with a summer version! Scroll to the bottom of this post to see it!
I know it isn't officially spring yet, but the temps sure feel like spring to me and we did "spring forward" today. Besides, I can't wait any longer to share this wreath with you. Although I do give my permission to pin anything on my blog, if you like this wreath I prefer that you pin my inspiration at P.S. Capture the Details instead. I copied Patty's almost exactly, so it only seems fair. Thank you.
I do want to tell you a little about my experience that may help you, though. If you decide to make this and you get to the store and find out how small the 8" wreath is, you may be tempted to go bigger. I was. But I'm glad I didn't because this wreath took me a full two hours to wrap!
I made three of these wreaths -- one for me, one for my mom and one for my mother-in-law. For the first one, I sat at the table to wrap it. But for the next two, I wrapped while watching a movie. It made it go a little faster. Also, I stopped wrapping every 10 wraps or so to fluff the yarn. I only fluffed the front of the wreath and I noticed a big difference because the back was all matted down and not that pretty. And another thing to make note of, my first wreath took exactly one skein of yarn, but the other two took slightly more than one skein. So I would suggest getting two skeins just to be safe. I also went with multiple colors of pins instead of all pink.
At first it was because that's all I could find. So I used several shades of pinks and purples and loved it so much that when I went back to get more and actually found a pack of only pink ones, I still decided to get the multi-pack.
I copied Patty's "bare feet welcome" sign as well, because it's so dang cute! So I made my own on my computer, printed it out and taped it to a toothpick.
I also made one with green letters and couldn't decide which I liked better. But either way, I love this wreath! It's hanging at the bottom of my steps by my front door. Every time I come down the steps, I see it and smile. Ahh, spring...
So please check out Patty's blog to find out how to make it. Her photos are beautiful!
Happy (early) Spring, everyone!
UPDATED 5/19/2013
I recently made a summer version of this wreath for my sister. I bought a strand of yellow-centered flowers and a pack of yellow and turquoise pins.
I also used yellow ribbon to hang it.
And my little sign reads, "flip flops optional."
It's just as cute, but not as Eastery, if you know what I mean.

Friday, March 9, 2012

Handprint Rainbows

I have one more quick rainbow project to share with you. My kids always like painting on their hands, even when they aren't supposed to. So for this project, I let them do everything themselves. They painted stripes on their hands,
and pushed their hands onto the paper.
They needed to push hard to make sure their palms touched the paper. Then they could keep making handprints until the paint wore off.


They really enjoyed this, and it was hardly any work for me! Gotta love that!

**Linking up to Rainbow Connection at Bent on Better Lunches!**

Thursday, March 8, 2012

Rainbow Mobiles

Today I showed the kids how to make a rainbow using a container of water, a mirror and a flashlight. All week we've been talking about how white light is actually a mix of all the colors and when it hits a raindrop, the colors separate. So the fact that I could show them that today was a huge deal. They loved it. Then we made another rainbow craft. First I had the kids paint a small paper plate. They painted the rim red, all the way around in a circle, then orange and so on.
We had also learned that rainbows are actually a full circle, but we can only see half of it from the ground, so this was a great craft to review that.
Once dry, I cut the paper plate in half to make two rainbows. I used a sun hole punch and a raindrop stencil to make a bunch of suns and raindrops to hang from curling ribbon. I used a glue stick to attach the raindrop or sun to one end of the ribbon.
Then I stuck another one on top.
The kids glued on one sun ribbon and up to four raindrop ribbons to the back of one-half of the paper plate.
Then I stapled both halves together to make a two-sided rainbow.
Is any of this making sense? It's really not that complicated, I just feel like I'm not explaining it very well. Anyway, I hung the mobiles from the ceiling and they look so pretty!


**Linking up to Sharing Saturday, The Sunday Showcase and Rainbow Connection at Bent on Better Lunches!**

Wednesday, March 7, 2012

Crushed Fruit Loop Rainbows

So everywhere I look, I see Fruit Loop rainbows. They are pretty cool, and great fine-motor practice for the kids, but I wanted to do something different. I had a huge bag of generic Fruit Loops left over from our necklace craft, so I brought that back to school. On Monday I had the kids separate the cereal by color.
Then I put them into plastic bags and the kids stepped on them to crush the cereal. They loved this, of course!
I finished the crushing phase with a rolling pin. And then on Tuesday, we made rainbows with our crushed Fruit Loops.
Our art table was so colorful!
I originally planned on them painting glue onto wax paper, with a template of the rainbow underneath.

But that wasn't really working. The wax paper kept moving when they brushed the glue on, so we just painted the paper rainbows instead. I used card stock paper so it would support all the glue better.
Using slightly watered-down glue, the kids painted one row at a time and sprinkled the crushed cereal on top.
It was pretty fine, but there were a few chunks in there. It still worked well, though.
Some kids chose to follow the colors of a real rainbow, with red being on top, but others just decorated it their own unique way.

Here's what our table looked like when we were done:
You can't tell me that doesn't look like we had fun! When they were dry, I cut them out and hung them in the window. Hopefully they will catch some sun rays. Now, you could accomplish the same look with colored sand, but they wouldn't smell nearly as fruity that way!

Tuesday, March 6, 2012

Finger-Painted Rainbows

In the afternoons I have a high school student help out in my room. She does a project with the kids about once a week. Today's project was so fun and pretty, I asked her if I could take pictures for my blog. Her name is Ms. Jessica and she gets all the credit for this!
She found a coloring page of a rainbow and put finger paint onto paper plates. The kids could dip their fingers in paint to color their rainbow. Most smeared it on, but some made fingerprints.

The paint was so vibrant and beautiful!
I had to get in on the action and make one myself.
When it was dry, I cut it out and hung it on one of my bulletin boards!
Earlier in the day, I set out a bunch of pom poms and 6 bowls, each a different color.
The kids used a "robotic claw" to pick up each pom pom and put it in the corresponding bowl.

I got the claws many years ago from either Oriental Trading or Party City. I don't remember which one. It was great fine-motor practice and the kids really enjoyed it.
And oh, what a quiet activity that was!

Monday, March 5, 2012

Crayon Transfer Art

Before I begin, I want to point out that I finally have a Tippytoe button! I spent most of Saturday working on it, and I have to thank my 2-year-old niece, Emmelia, for being my foot model and her parents for taking a bunch of pictures of her standing on her tippy toes! I've also been moving things around a bit and am working on a new header. (I gotta take advantage of Picnik while I can!) So I hope everything will be done in the next couple of weeks. But now on to the art project.
I discovered by accident this cool way to draw. Several years ago I was writing on the back of a piece of paper that a child had colored with crayon. When I lifted up the paper, I noticed what I had written was now on a different piece of paper, and written in the color of the crayon! Maybe I was the last to know about this crayon transfer thing, but I thought it was so cool. So for art today I colored really hard with crayons on a piece of paper.
We are learning about rainbows this week, so I made a rainbow. You have to press hard when you color. I made about 8 of these, but also left some paper blank for kids to make their own. Then what you do is flip over the paper, put it on top of another piece of paper, and use a pen to write or draw. You should be drawing on the back of the rainbow, and again you need to press hard with the pen for the best results.
When you peel up the paper with the rainbow, you should see what you wrote on the other piece of paper!
(Sorry about the quality of the picture. It didn't show up that well on camera.) And the neat thing is you can use the colored paper over and over again, writing on top of what you already wrote.
You can also just scribble, and it still looks cool!
You don't need to write with a pen. Anything with a point should work, as long as you press down hard enough.
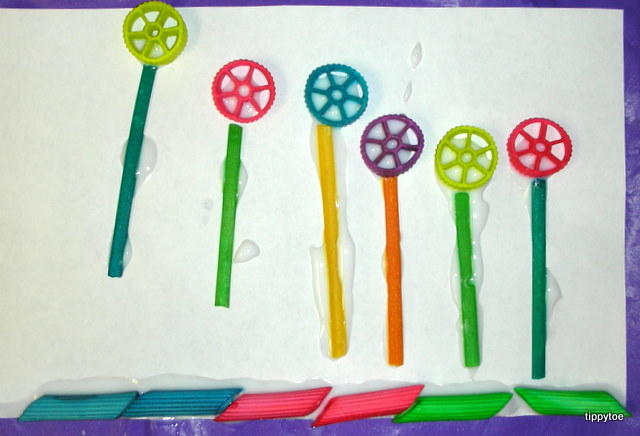
We also made art with rainbow pasta.


You can find out how I made it, or see what the kids made last year, here.