Tuesday, January 31, 2012

Patchwork Hearts

I love today's project. The kids had so much fun doing it. I cleaned my craft closet over the weekend and found a bunch of valentine scrap paper.
I thought it would be perfect for some sort of valentine project. So I started thinking about it and came up with this idea. I cut out hearts from white construction paper.
Then I cut up the scrap paper into smaller pieces and put them out with glue sticks and scissors. The kids cut up the paper any way they liked and glued it to the heart.

I trimmed the pieces that hung over the edges and the result was a beautiful patchwork heart.

Then I laminated them and wrote their names on them with Sharpies.
I found red lunch bags at Target and bought them to use as Valentine bags, so I'll just add the heart to the bag before our party!

Sunday, January 29, 2012

YAH: Simple Diaper Cake

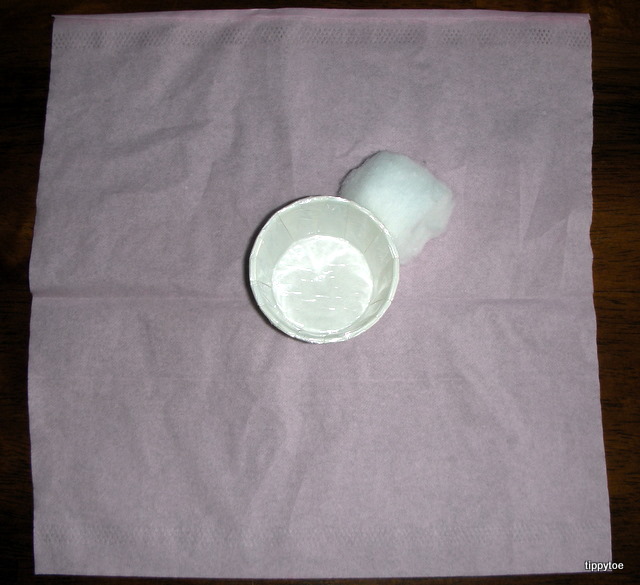
I know there are some over-the-top diaper cakes out there, but I have a simple one to share with you today. I made it for my sister-in-law and needed to ship it to Texas, so I had to keep it small and travel-friendly. My mom has been making these for decades, so she was my inspiration. You'll need a package of diapers (I used newborns) and any baby items you want to put on the cake -- socks, pacifiers, nail clippers, teething rings, wash cloths, etc... Open up the first diaper the long way, but keep the elastic edges in if you can, and roll it up. Then open another diaper and put the rolled up one inside on one edge and roll it again. Keep doing this until it gets bigger and bigger. After awhile I used tape to hold it together while I got out my next diaper.
Keep rolling until it's the size you want. I used about 40 diapers.
When you get to the last diaper, just fold over the decorative edge so you can't see it and use clear packaging tape around the whole thing to keep it together. This will be covered up by ribbon later.
Now, my mom used to make 2-layer cakes, and this small one would just be the top layer. So if you want to make a bottom layer, you would do the same thing but use a lot more diapers. Like I said before, I was mailing this so I kept it small. Besides, diapers are not cheap so it also depends on how much you want to spend. To keep items on the cake, I used Q-tips. You can definitely use pink for girls and blue for boys, or just plain white ones. I knew my sister-in-law was decorating the nursery in a soft green, so I chose to use green items. I know I have seen green Q-tips before, but of course I couldn't find them. So I made my own by buying green ribbon and wrapping it around the Q-tip.
A tiny dab of glue held it in place. Then you stick the Q-tips all over the top of the cake by squishing them between the layers of diapers. Finally, add your baby items. The socks can go right over the Q-tips and the pacifier clips can be clipped onto the Q-tips. For the pacifiers themselves and the nail clippers, I decided to tie some green ribbon onto them and then tie them to a Q-tip so they hung down the side of the cake. Other items, like spoons, can just stick right into the cake. I tied ribbon around some wash cloths and put those over Q-tips, as well. If I had found a nice rattle that wasn't completely gaudy, I would have put that right in the middle of the cake, but I couldn't so I just used a spoon. I also normally add a brush and comb, but I couldn't find a green or white set, only pink and blue.
Add your ribbon around the cake. I used glue dots to hold it on. Then I used my Bowdabra to make a double-layer bow (I couldn't resist throwing in some frogs!)
and stuck it to the front of the cake.


I was told it arrived in one piece and was used as a centerpiece at her shower! Is your recipient more into cloth diapers? No problem. You can make one the exact same way. The diapers make great burp cloths! Here is one my mom made for my sister's shower last weekend:
So pretty! (You can see my baby booties next to it!)

YAH: Baby Shower Party Favor Booties

Last week my family rented a house in Minneapolis to have a surprise party for our mother's 70th birthday. Actually, we celebrated her 54th anniversary of her sweet 16!

(Sorry about the picture quality -- not my camera!) She thought it was just going to be a girls' weekend with her 5 daughters, but 3 of her sons and two grandchildren came as well. It was a wonderful weekend and several of us went to see The Lion King. It was AMAZING!
Anyway, while we were there, we also had a surprise baby shower for my sister Kate. I made the cutest little party favors! And they are so, so easy. I got this idea from here. All you need are kleenex, cotton balls, and party or nut cups. Place your kleenex on the table and put a nut cup and cotton ball on top. They should be in the middle of the kleenex, with the cotton ball facing one corner.
Warning: If you have a cat that likes to play with, well, anything and everything, she may swat at it right as you are taking a picture!
But back to the show. Then fold the kleenex over the top of the cotton ball and nut cup, tucking it into the cup.
Keep tucking the kleenex
until it is all inside the nut cup.
Add another nut cup over the kleenex, right inside the first nut cup. This holds it all together.
Then add candy or nuts or whatever!
I filled mine with Starburst jelly beans and they were displayed around my sister's cake.
Yes, we had two big cakes that weekend, both made by my sister Suzie!

Friday, January 27, 2012

Silly Skeletons

We learned about muscles and bones today, then I sent the kids to the art table which looked like this:
I told them to put together a skeleton using the pieces here. I didn't give them any example or guidelines. The result? Adorable skeletons!


OK, OK, so they were missing a few bones, but that's what made them so cute! During circle time I read the book The Skeleton in the Closet by Alice Schertle.
It's about a skeleton that sneaks into a little boy's room to get some clothes! So I printed out a fun part of the book and hung the skeletons up around it.

As you can see I had a really small class today. It was a great Friday!

Thursday, January 26, 2012

Bubble-Blowin' Art

After learning how our lungs work today, we did a very fun activity. This is something I've been doing for years, and always thought it was kind of unique, but since I've started blogging I've noticed it all over the place. I filled 4 bowls with soapy water and added lots of food coloring.
I used the neon colors.
I cut out hearts from white construction paper and cut straws in half. The kids put their straws in the bowls and used their lungs to blow bubbles. (See how I tied it into our theme?)
Then they gently placed their paper on top of the bubbles,
which made them pop, leaving a colorful design behind.


So pretty, right? Then I dug out an alligator (or is it a dragon?) blowing bubbles that I made years ago
and hung up all the hearts next to it, like he was blowing heart-shaped bubbles.
And with Valentine's Day right around the corner, it's the perfect display to get us in the mood.

Wednesday, January 25, 2012

Heart Art

Today we learned about our heart. For the art project I cut several pieces of white paper diagonally and used double-stick tape to attach them to pieces of red paper.
As you can see, I didn't cut very straight. It doesn't really matter. Then I put some heart-shaped cookie cutters into paint
and the kids got busy stamping.


I love how the two-toned paper adds a little something extra. And because we learned about our heart, I made heart-shaped jigglers from four different flavors of jello.
I had plenty left over to share with other classes. So what's my secret to getting jigglers to come out of the pan so easily? PAM. Yep, that's right. The whole "dip the pan into hot water" thing never worked for me. So one day I decided to spray the pan with PAM, rub it around with a paper towel, and pour in the jello. Sure enough, it worked like a charm! Now I do that all the time. And the bottom of the jigglers aren't slimy at all. They're perfect!